|
New Covers
| Seat Cushion |
Back Center |
Headrest | Seat Back |
Final Assembly
New Covers
|
|
I ordered my new seat covers from GAHH. If it is
within your budget I highly recommend them. I ordered a
non-standard color vinyl and also requested the center sections
be embossed which is another non-standard request. They
worked with me to make sure they understood exactly what I
wanted, and sent me color samples to verify color match with my
back seat. I place my order on a Tuesday and received the
covers 8 days later. That's impressive turn around time
for a custom order that needed to be shipped all the way across
the country via UPS ground. |
Seat Cushion
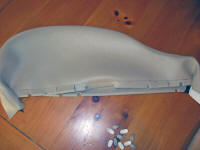
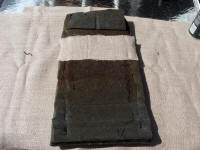
| The bolster covers did not come with all the notches cut
into the bottom edges for the retaining wire. The first
thing I did was make a template of all the notch locations for
the inside and outside edges and then cut the notches out on all
four bolster covers. |
|
|
|
|
I made a template of the notches on the inside and outside edges using one of the original covers. |
|
|
|
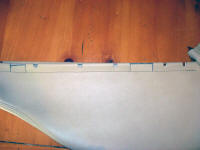
Marked the notch locations on the bolsters. |
|
|
|
Cut out the notches with a sharp x-acto knife using a cutting board to protect the opposite side of the cover. Take your time with this, there is no fixing a mistake. |
|
|
|
|
|
All notches cut on both edges |
|
|
|
Insering the retaining wires into the pockets on the bottom edges. |
|
|
|
Wires inserted and the covers are ready to be installed on the seat frame. |
|
|
|
I started the cushion assembly by gluing the center cushion cover
onto the foam. I dry-fit the cover over the foam making sure it
was square and all the corners matched. I them pulled back the
cover only half way at a time for gluing so that I would not lose the
correct positioning.
|
|
|
|
Position the cover over the cushion and the pull it back one half at a time and glue the cover to the foam. |
|
|
|
Flip the cushion over and glue the sides of the cover to the bottom edges of the foam. |
|
|
|
Cover glued to the foam. |
|
|
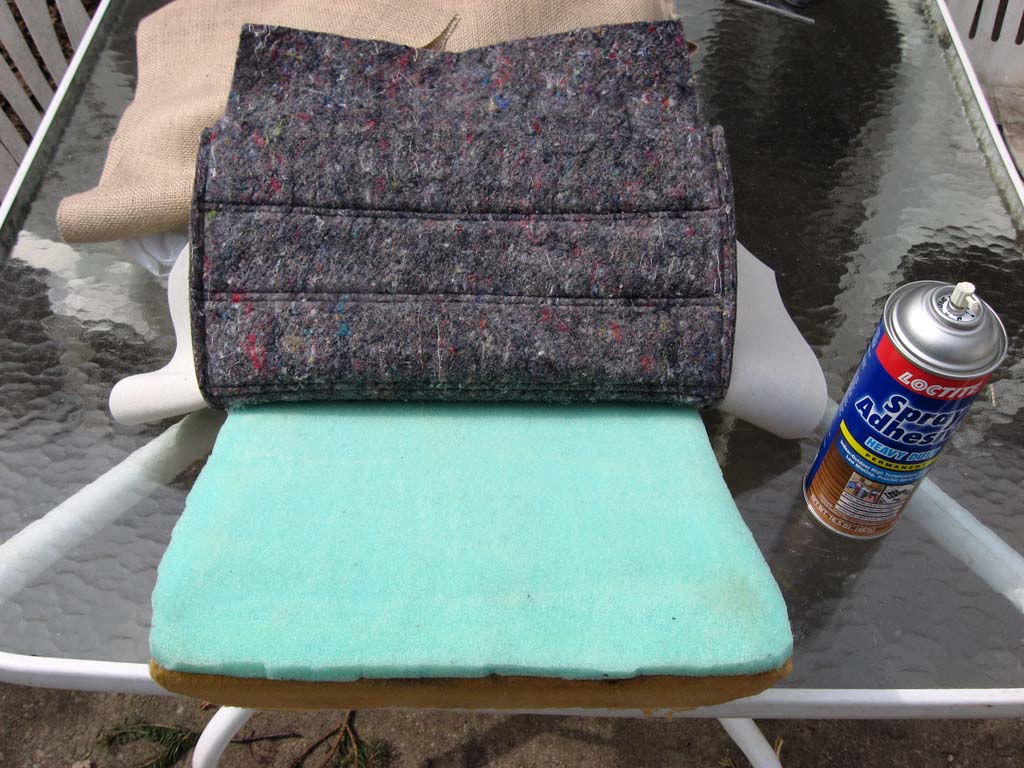
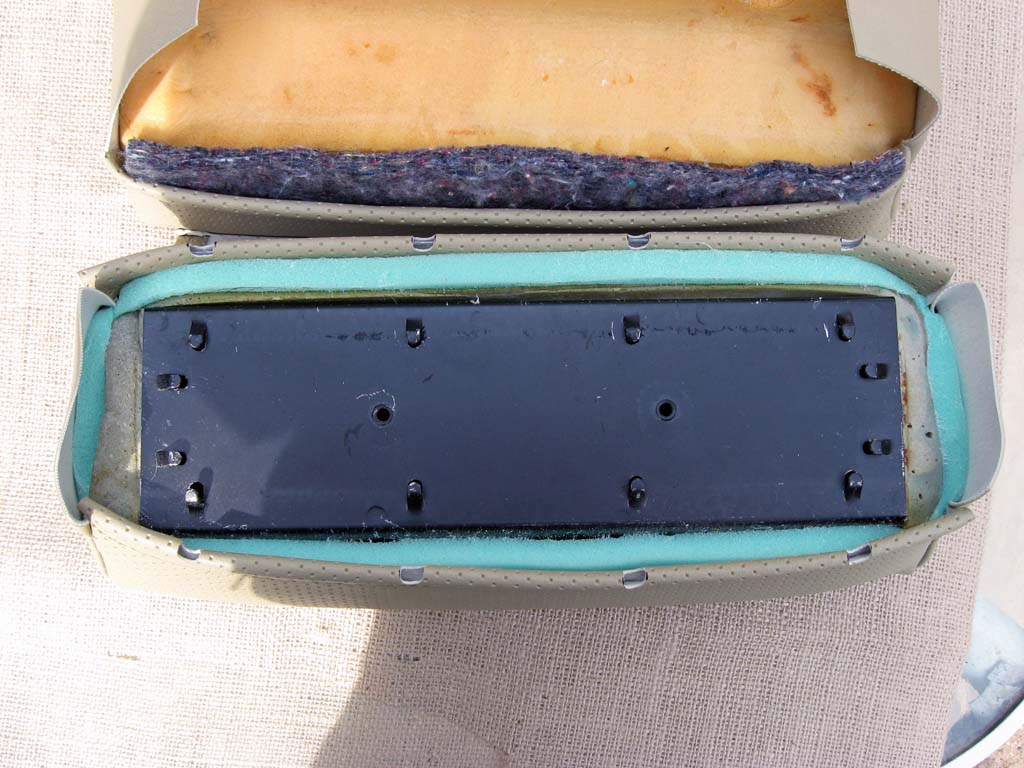
Next I inserted the thigh rest foam into the cover and discovered that
the cover was a little larger than the foam. I fixed this by
wrapping the foam insert with some half inch high density foam.
The modified foam insert was then a nice tight fit in the cover.
Notches needed to be cut into the cover for the retaining wires used on
the front and back edges of the thigh rest.
|
|
|
|
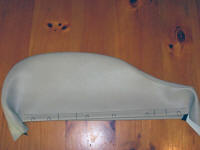
Original thigh rest foam insert was too small to fit the cover correctly. |
|
|
|
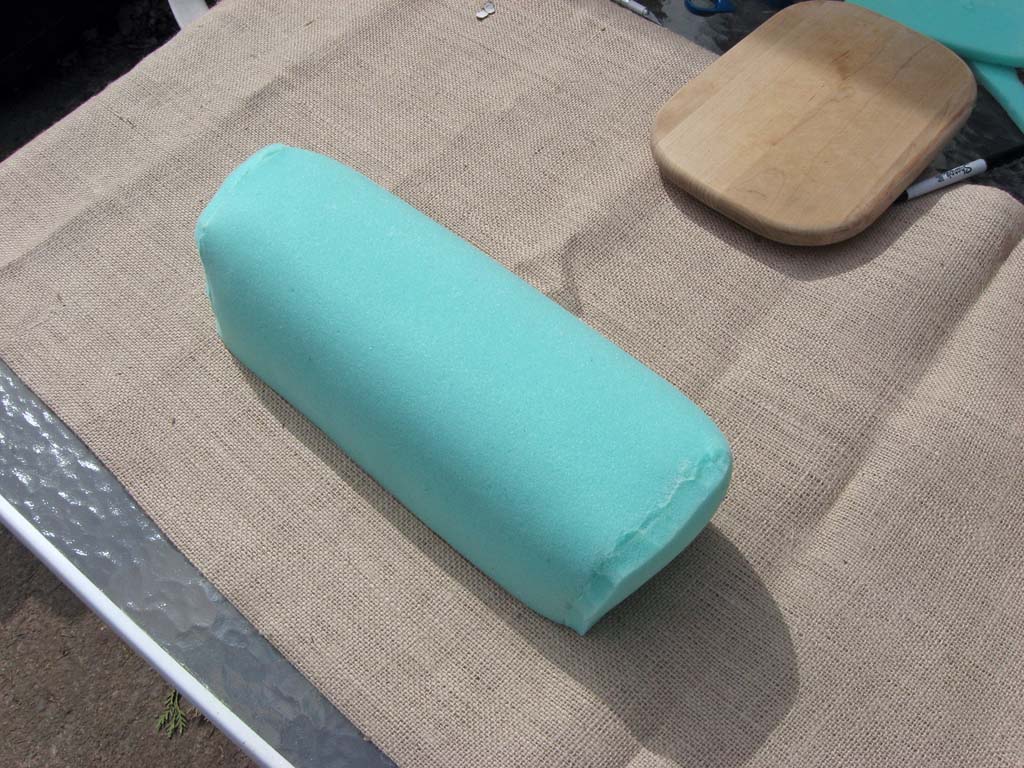
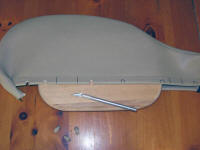
Thigh rest insert wrapped with half inch high denity foam to make it bigger. |
|

|
|
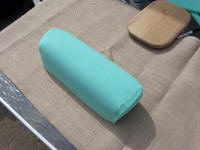
Insert was then a nice tight fit in the cover. |
|

|
|
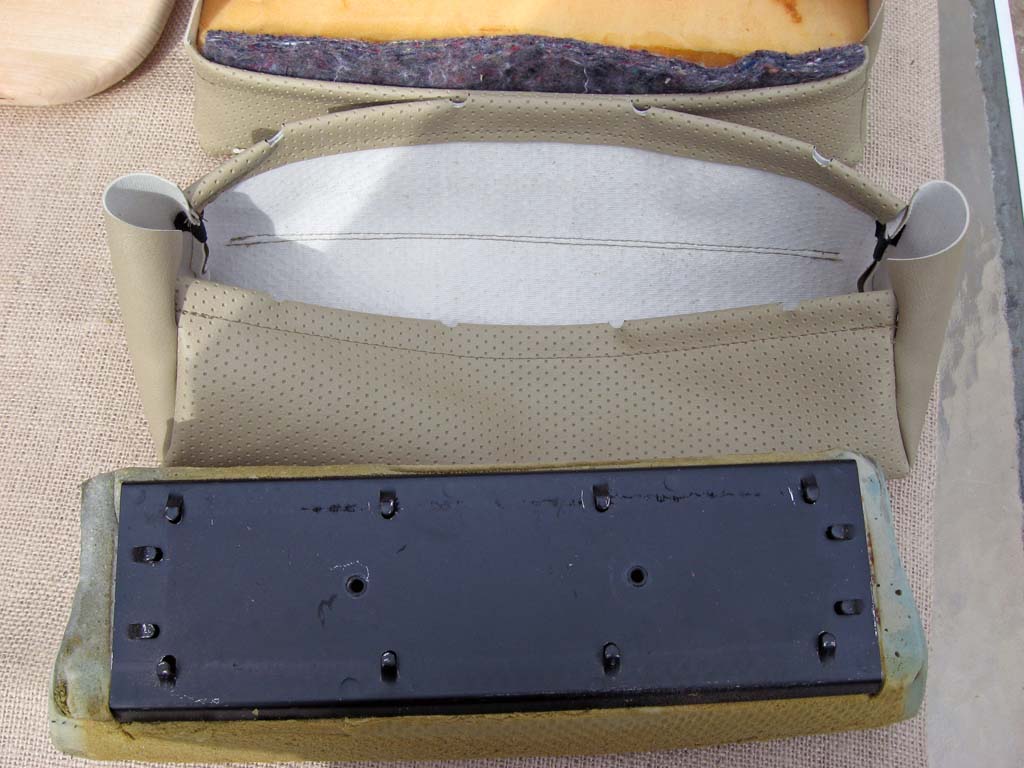
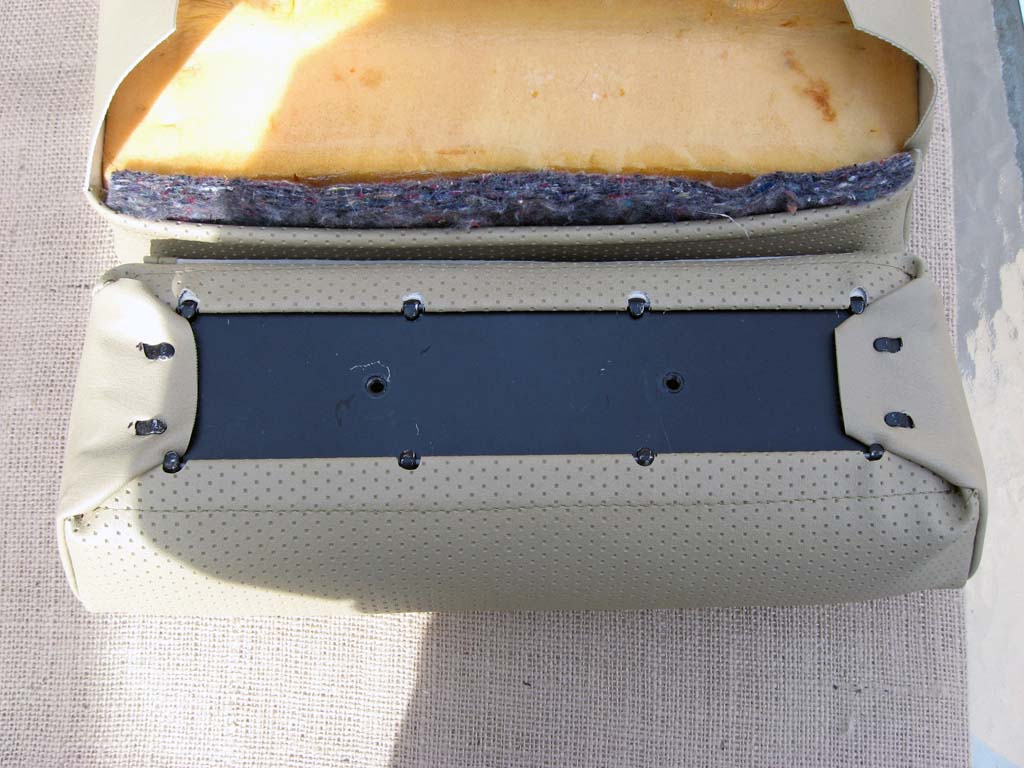
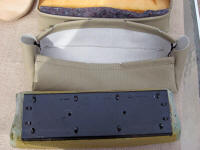
Cover is held into the metal plate with two retaining wires front and back as well as a couple tabs on each side. I needed to cut the notches for the wires and the slots for the tabs. |
|
|
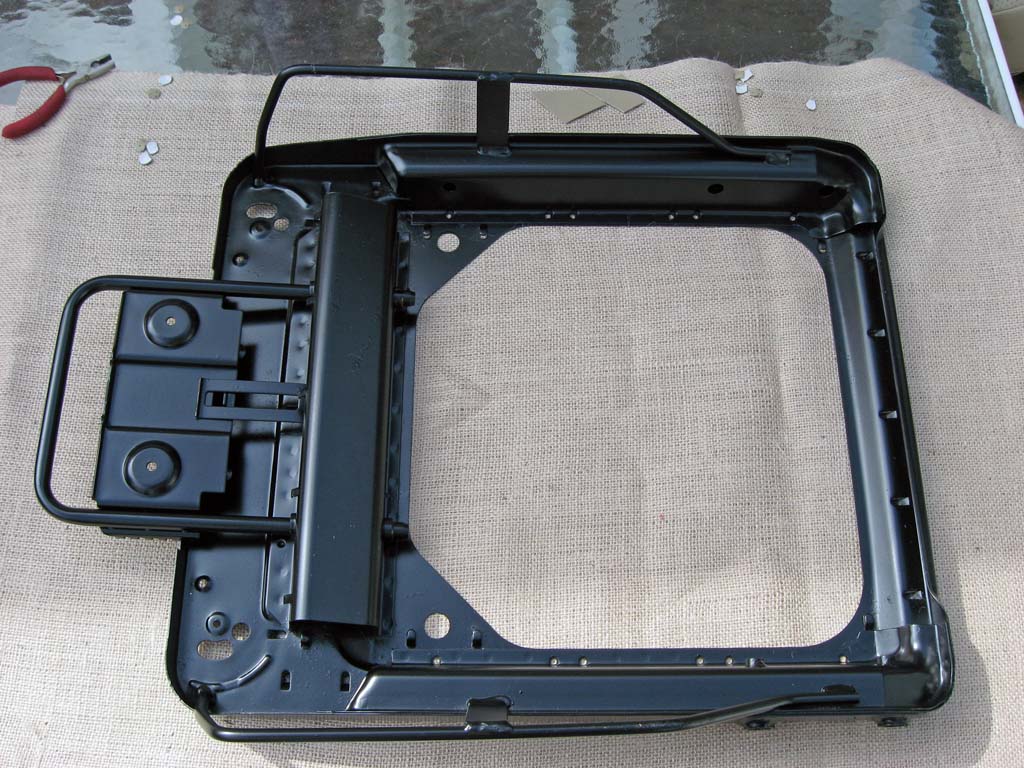
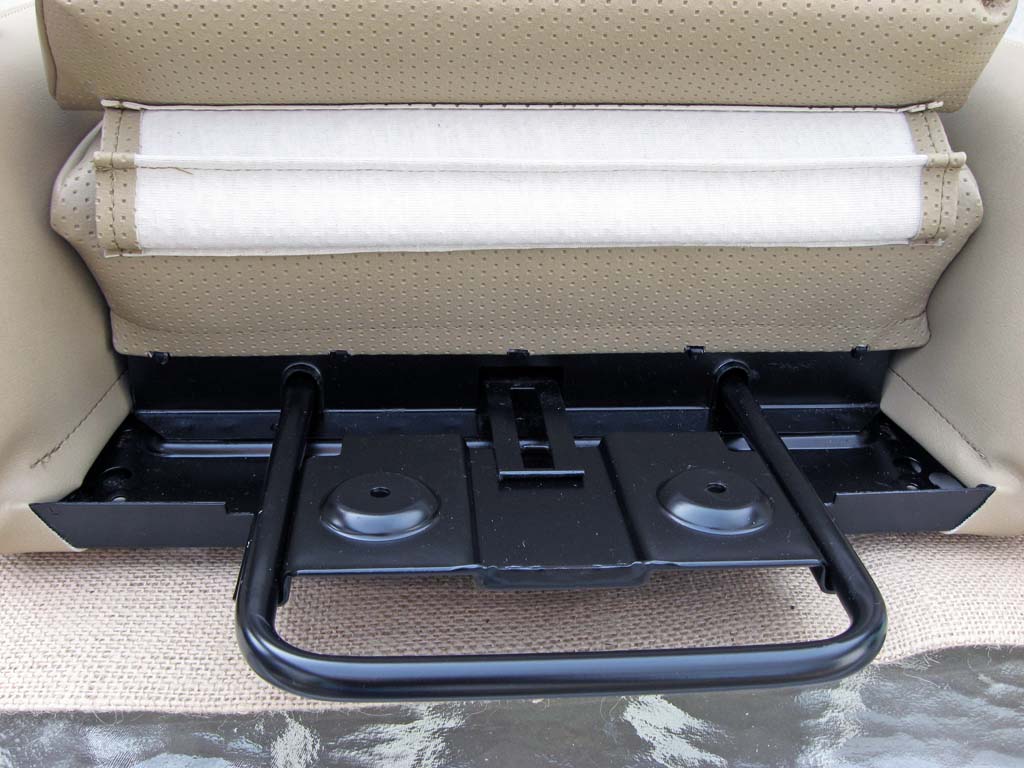
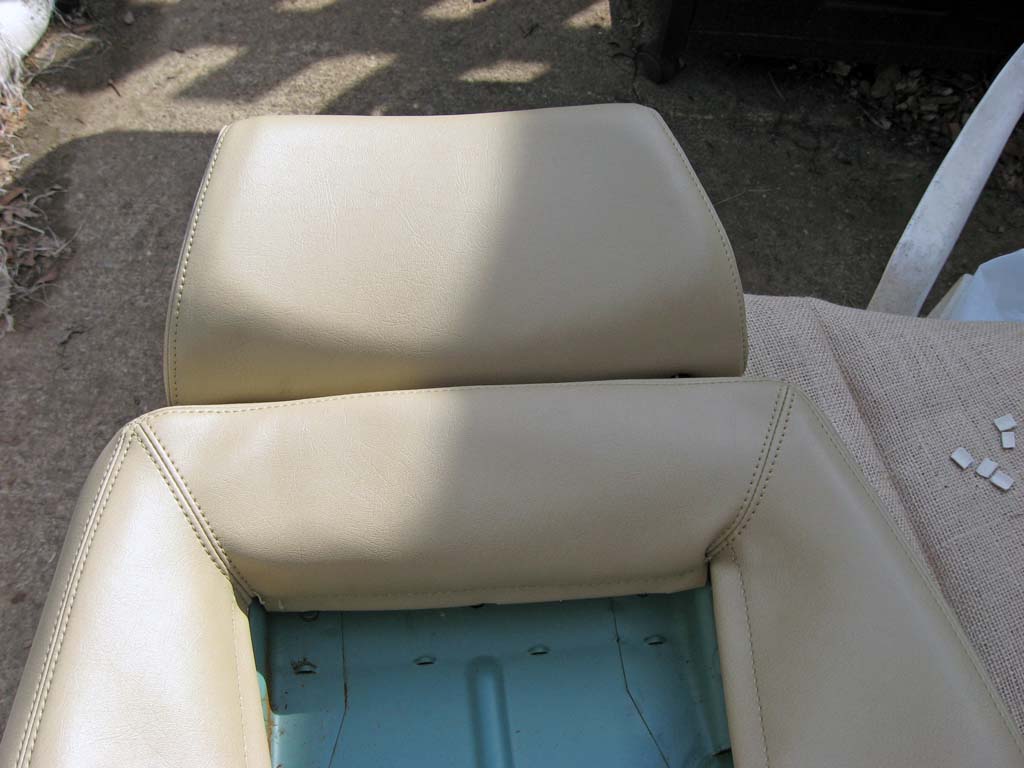
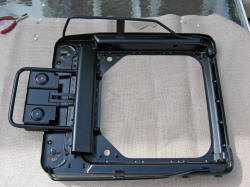
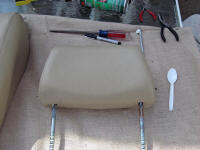
Now it was finally time to install these pieces onto the bottom frame.
I cleaned up the frame with some wire brushing and sanding and then
repainted it satin black. The first pieces installed were the side
bolsters. This is a pretty straight forward process of slipping
the foam onto the frame and then pulling the covers over the foam.
Start at the front and get the cover tight against the foam and then
work the cover back and down over the foam. Then install the
retaining wires under the tabs in the frame starting at the front inside
edge working along the inside edge to the back. Then do the
outside edge working from the front to the back.
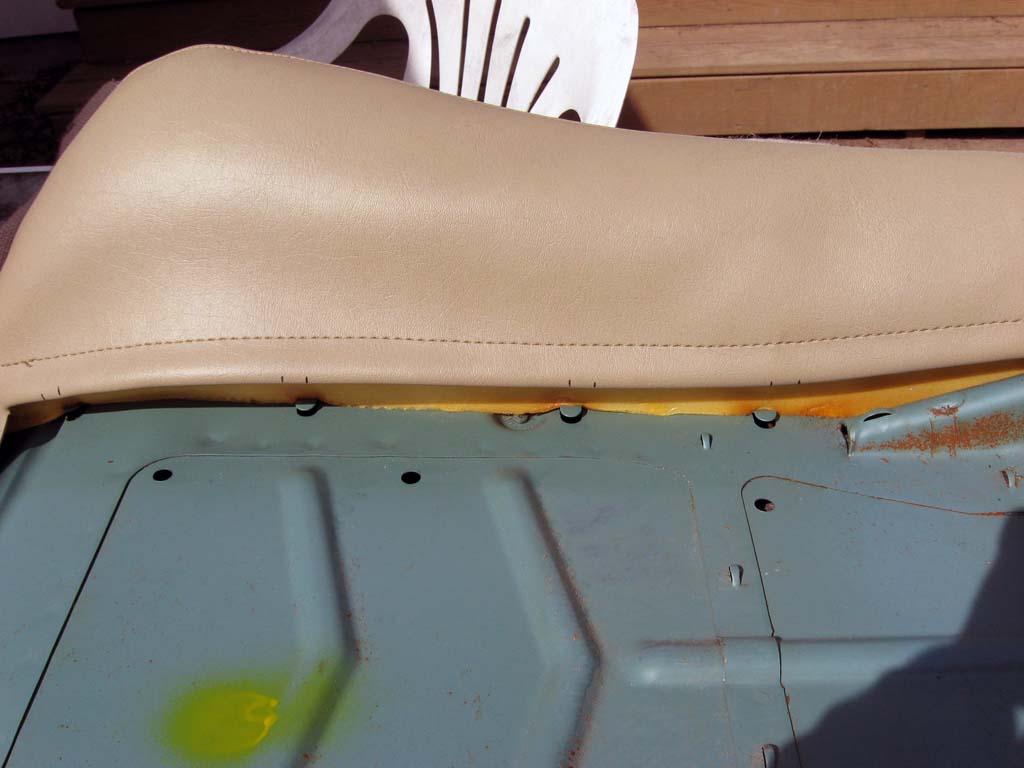
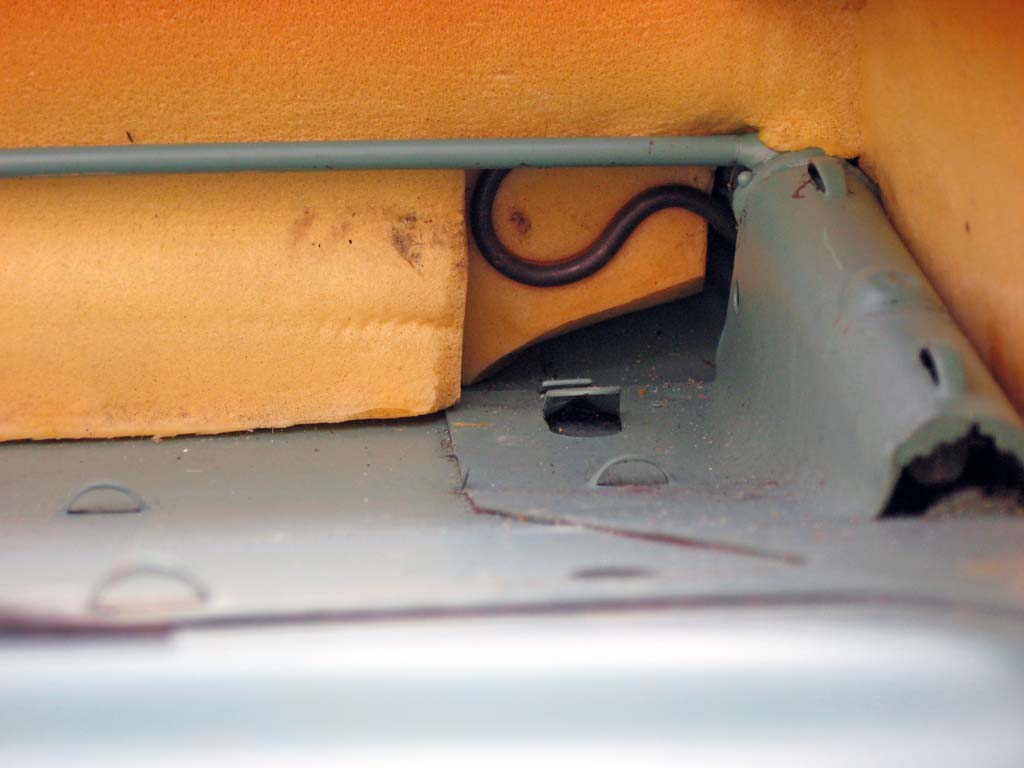
The front cushion is simply held on with a retaining wire front and
rear. The thigh rest is screwed back onto the adjuster in the
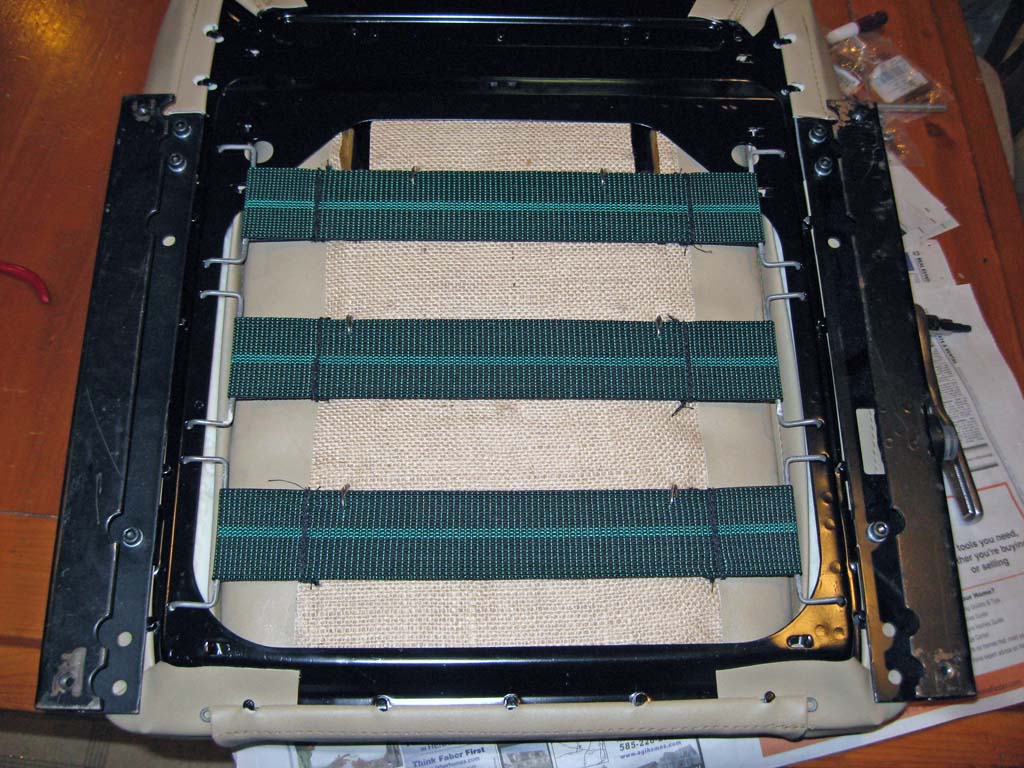
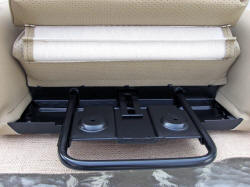
frame. The last step was to install the new bottom straps I picked
up from Aardvark Racing.
|
|
|
|
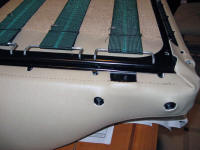
Bottom frame cleaned up and painted satin black. |
|
|
|
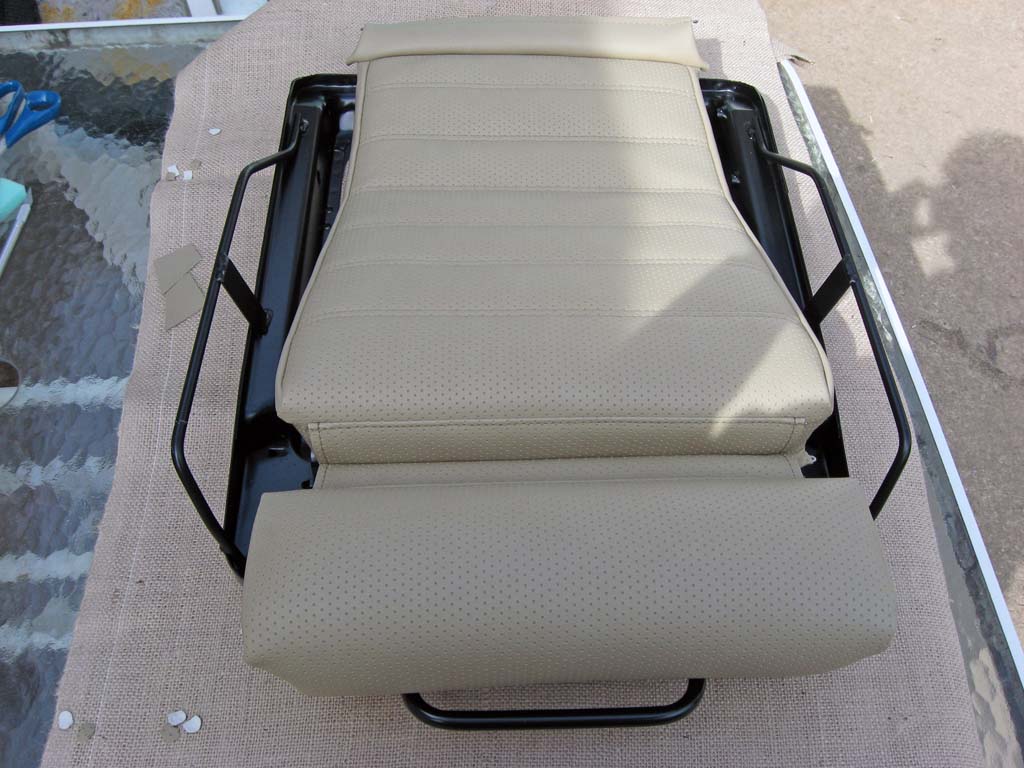
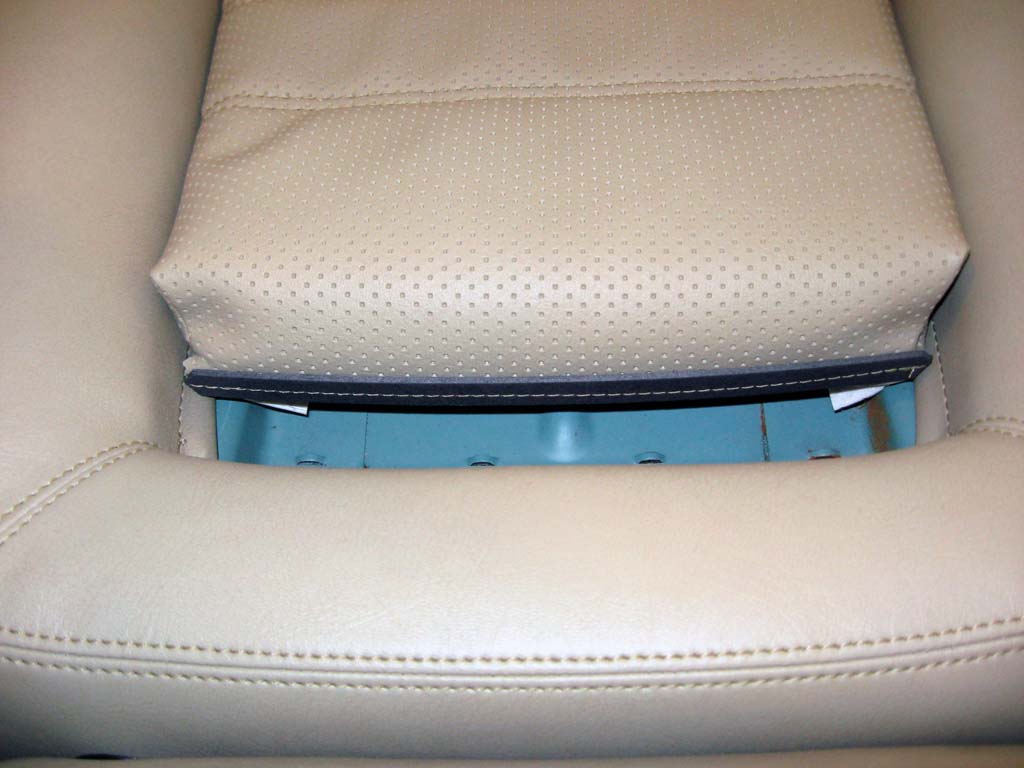
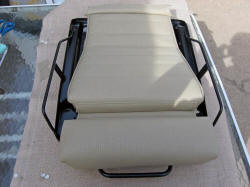
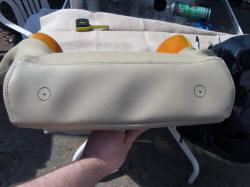
Quick test fit of the center cushion. |
|
|
|
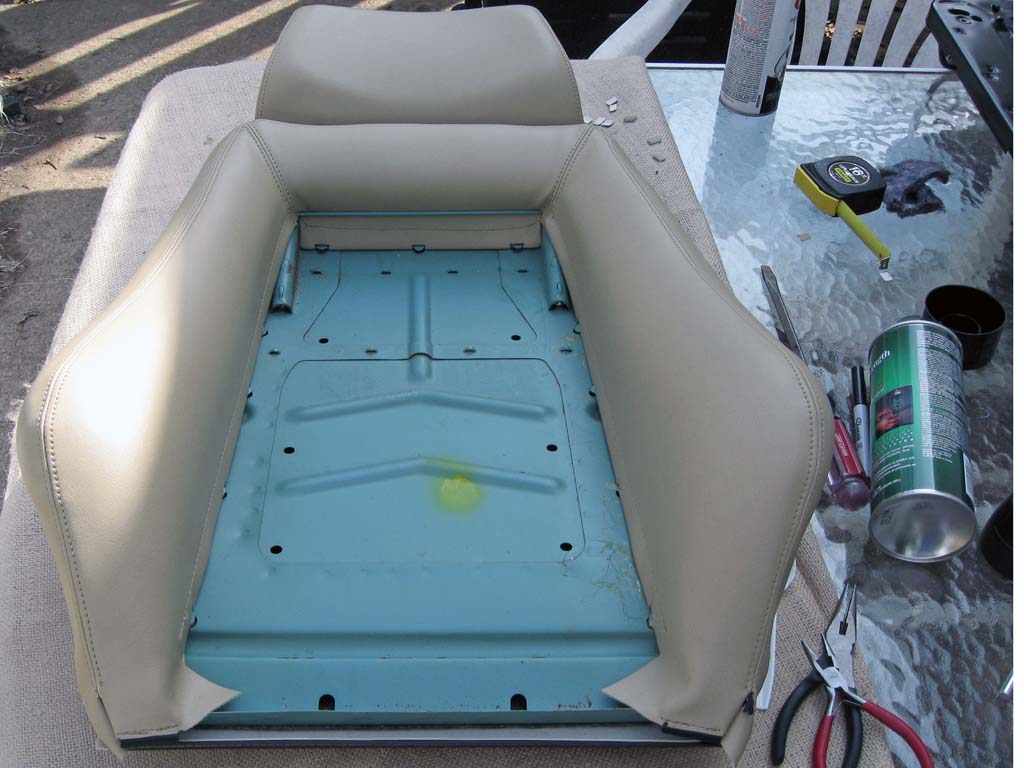
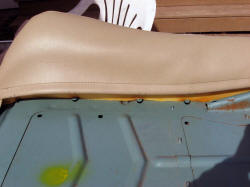
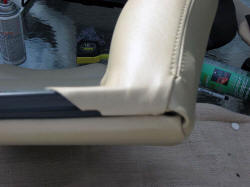
Side bolsters installed. The fronts will smooth out some more as the vinyl stretches and the foam compresses a little. |
|
|
|
|
|
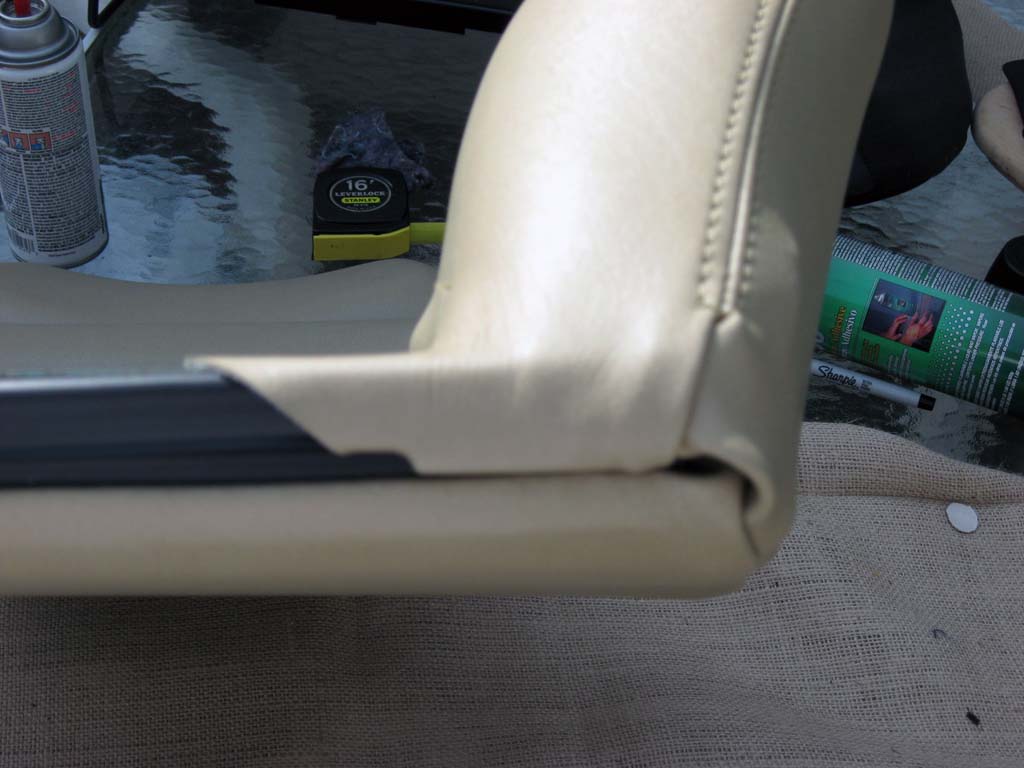
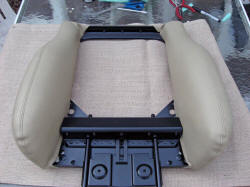
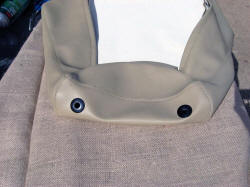
Installing the front edge of the center cushion. The rear is installed in a similar way with a retaining wire. I had to cut the nothces for the front retaining wire. |
|

|
|
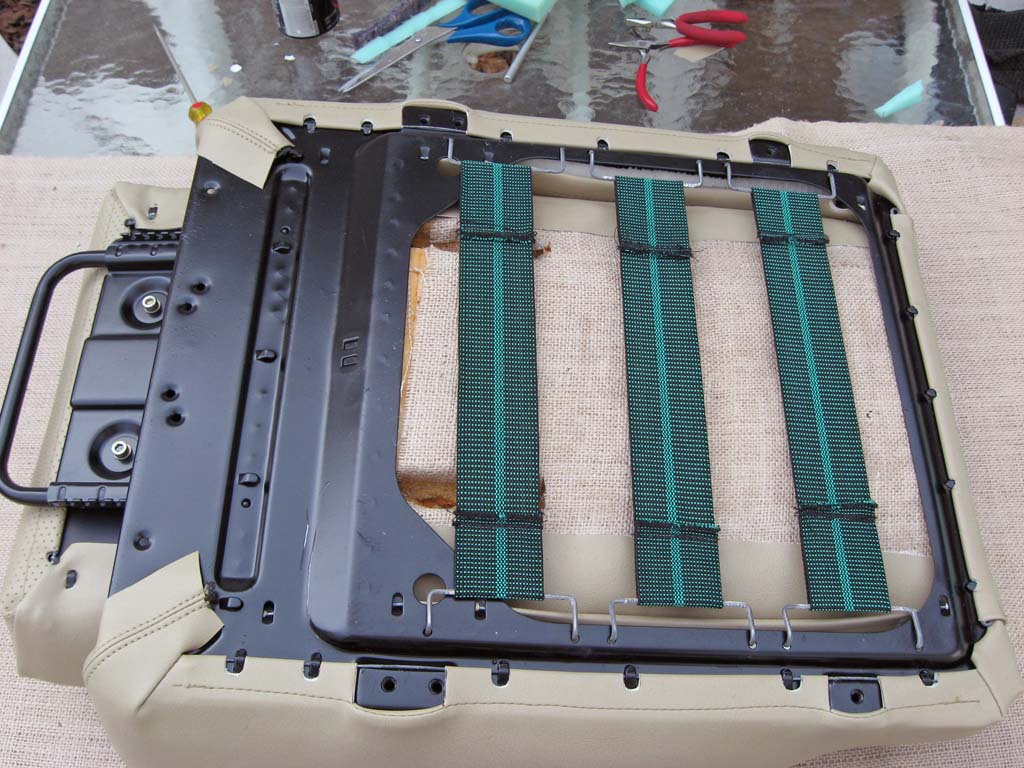
New bottom straps from Aardvark Racing. |
|
|
|
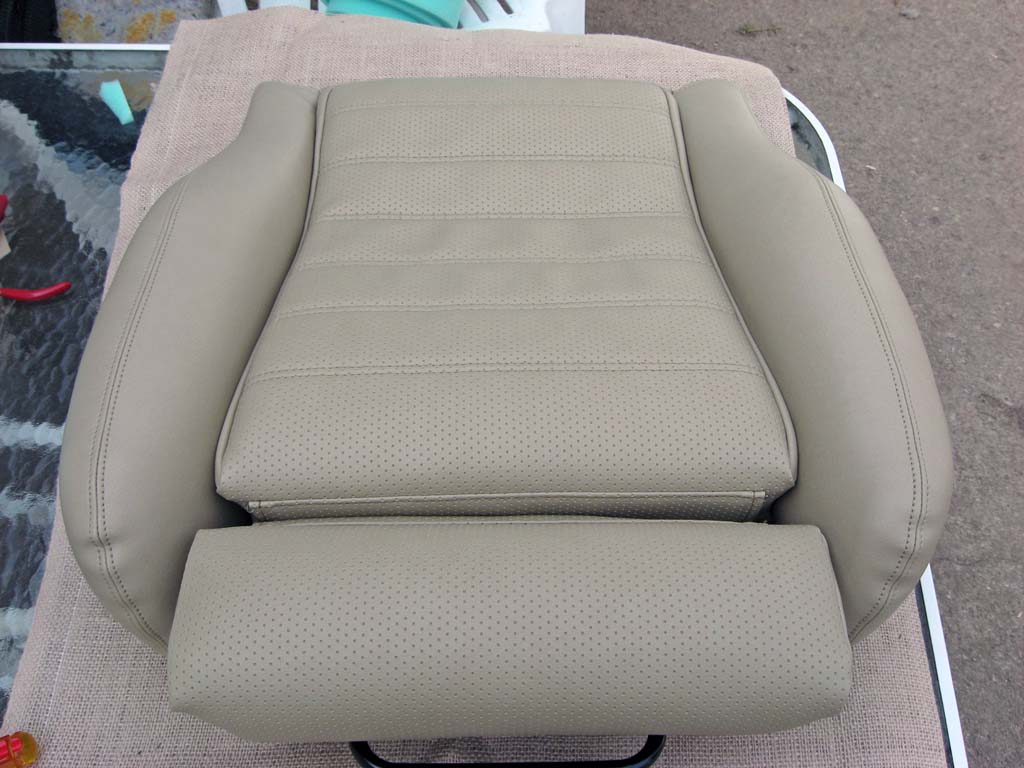
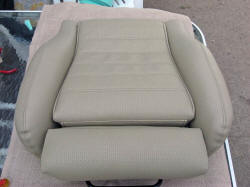
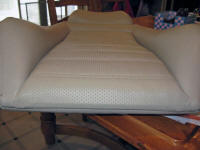
Seat bottom as good as new. |
|
|
The puckering in the front on the side bolster should mostly work itself
out over time as the bolster covers stretch a little. I still need
to install the hog rings on the corners of the covers but I will wait so
I can work the vinyl by hand to get some final adjustments to the covers
made. I also need to install the hog rings that help secure the
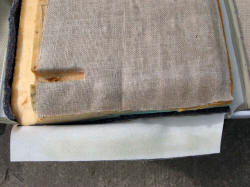
bottom straps to the seat cushion. The burlap I added to the
cushion should help hold the rings better than the original.
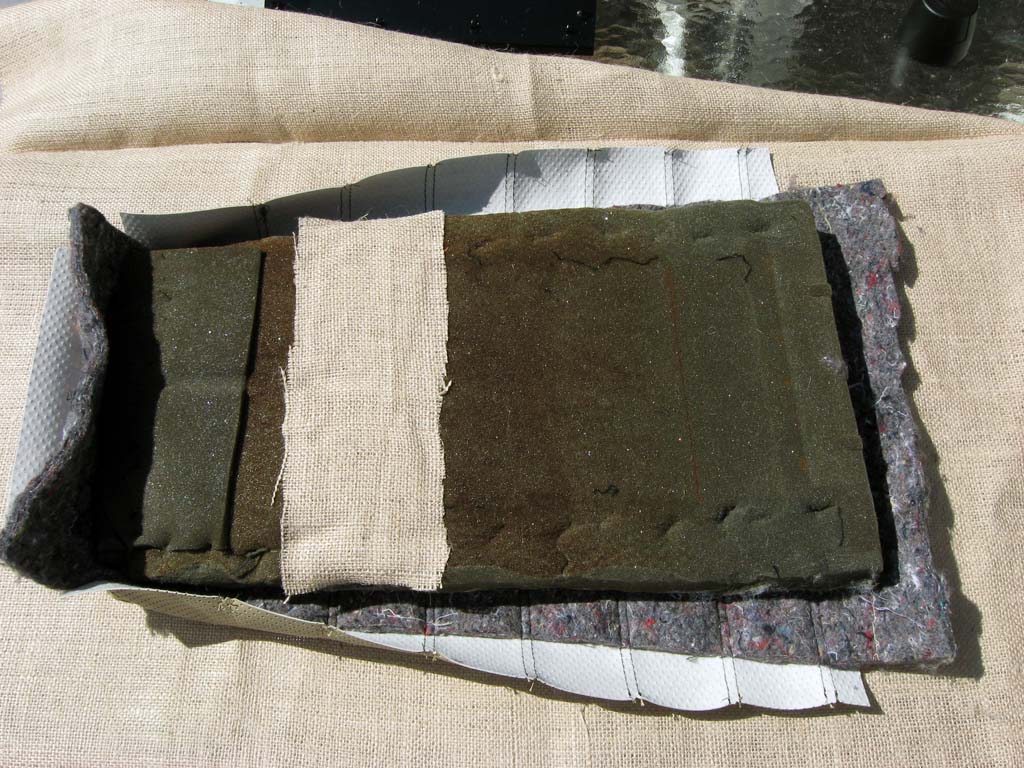
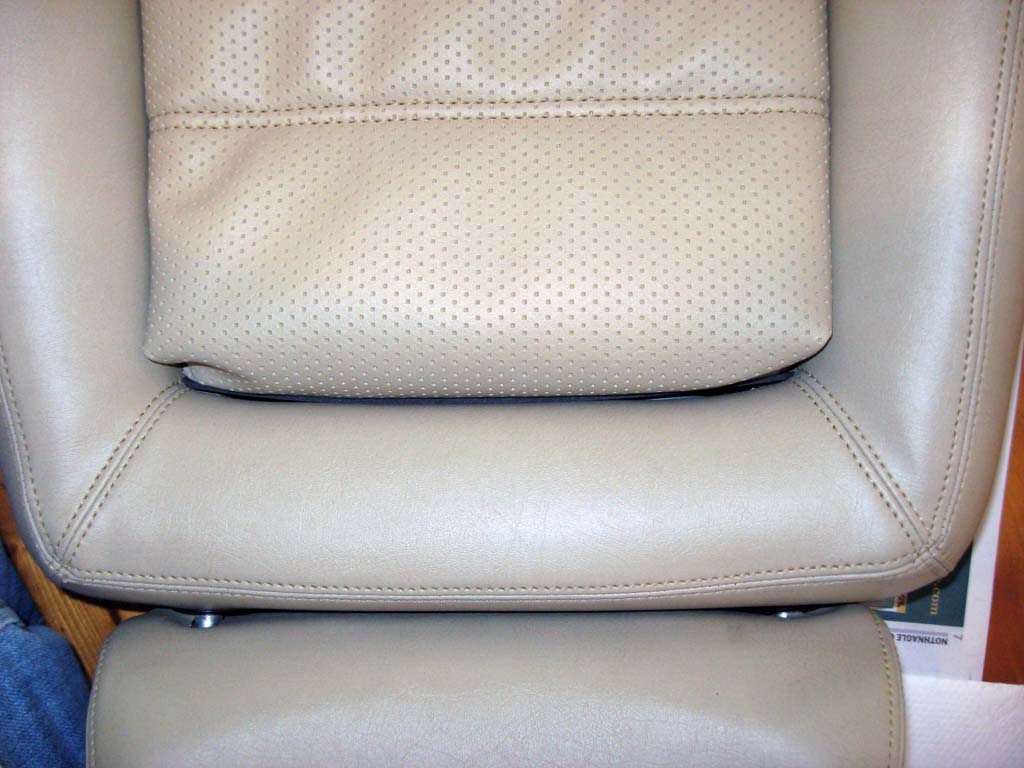
Back Center Cushion
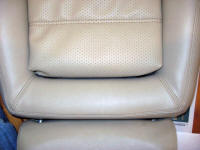
The assembly of the center backrest cushion was very straight forward.
The new cover was simply glued onto the original foam which was still in
good shape.
|
|
|
|
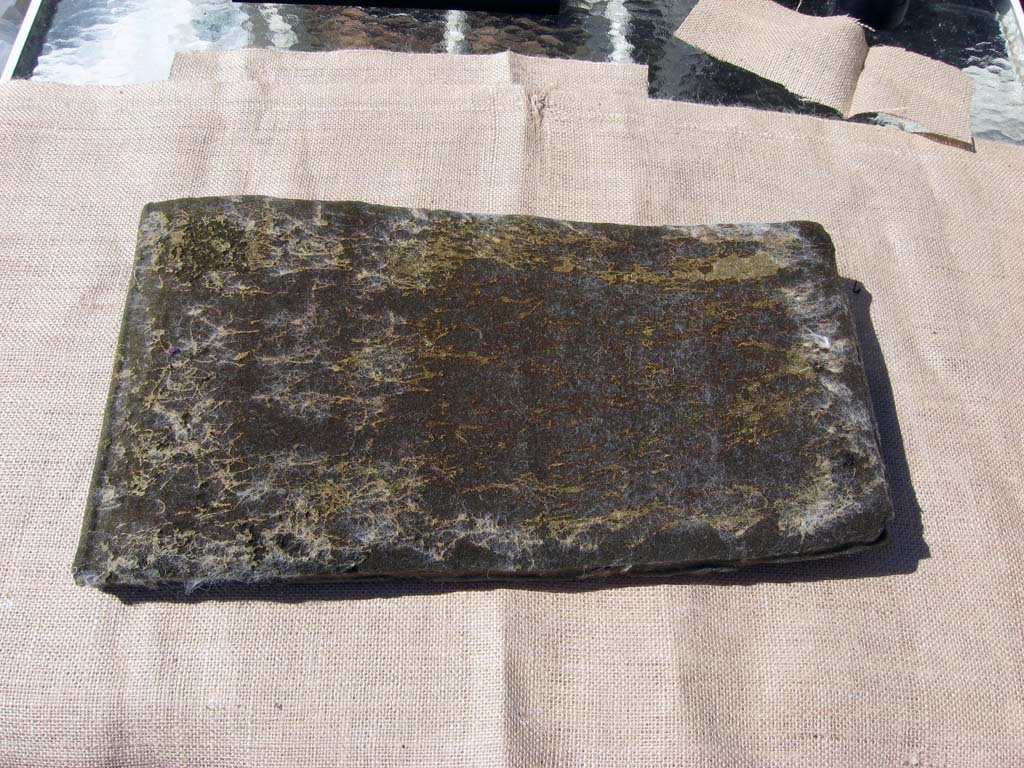
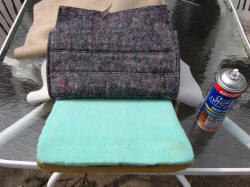
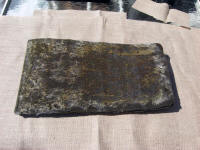
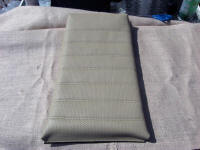
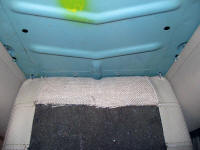
The original center cushion foam was still in good shape so I re-used it. |
|
|
|
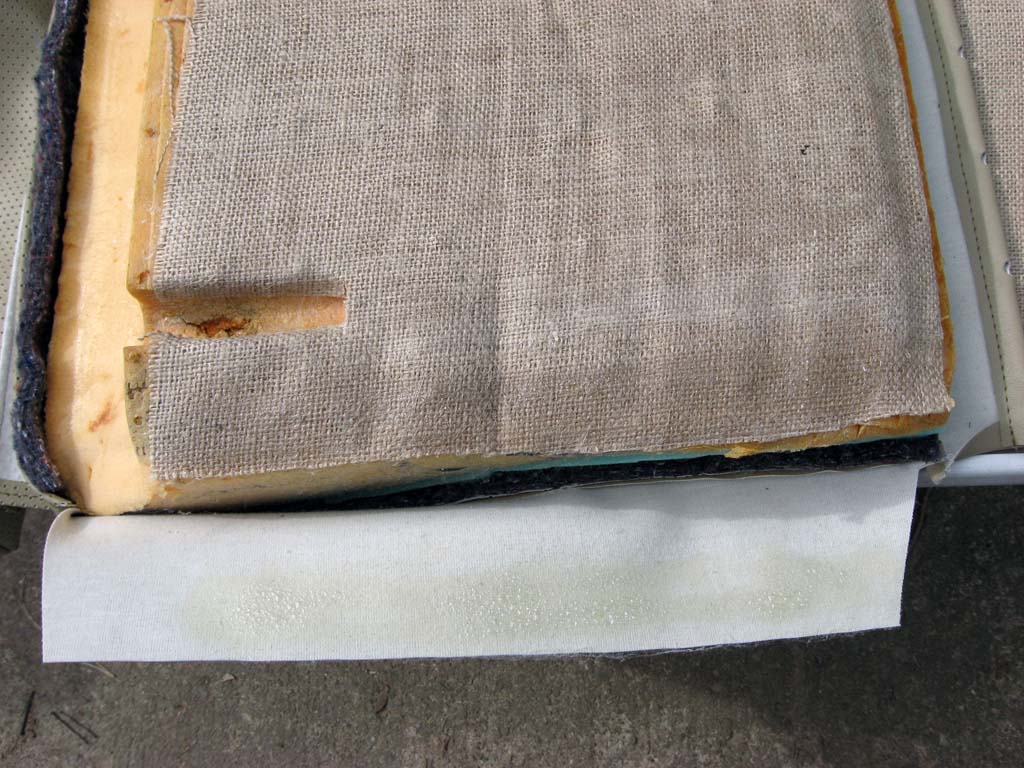
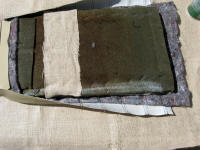
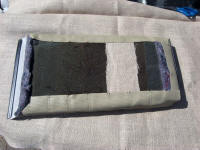
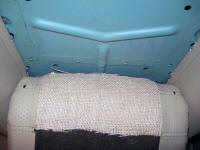
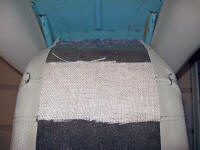
I glued a new piece of burlap onto the back of the foam to reinforce it where the cushion is attached to the backrest frame with hog rings. |
|

|
|
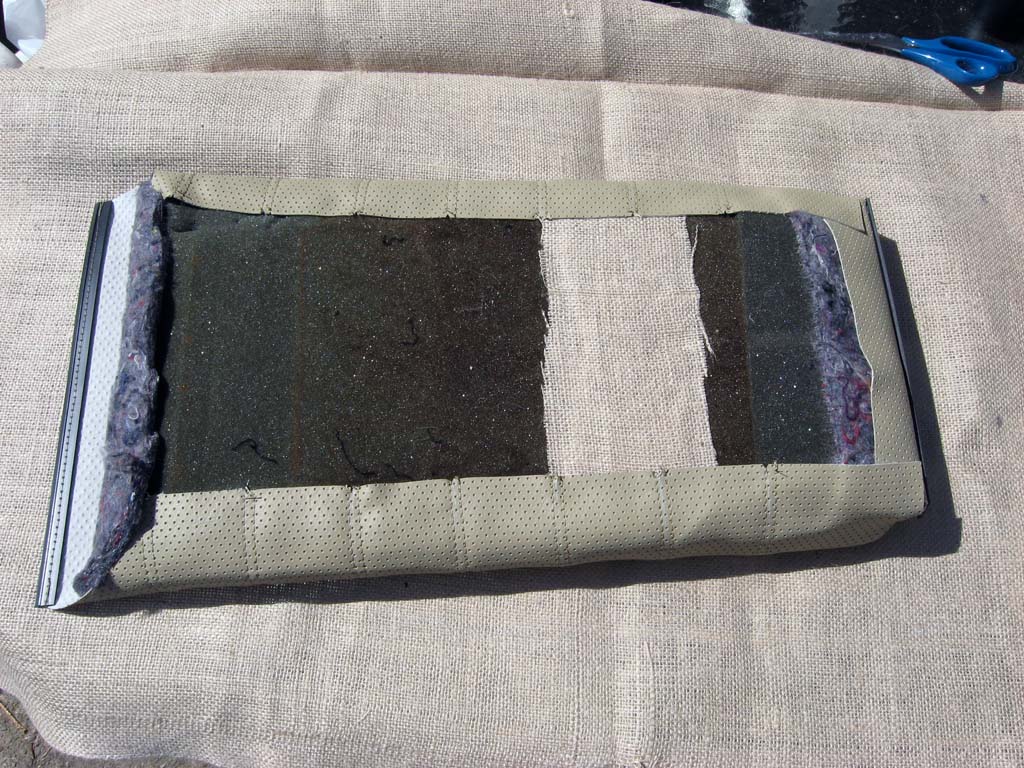
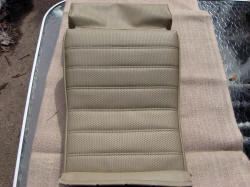
The foam pad was then positioned on the cover being careful to get it up into the top corners and square on the cover. The cover was then glued onto the pad one half at a time, using the same technique as the center seat cushion. |
|

|
|
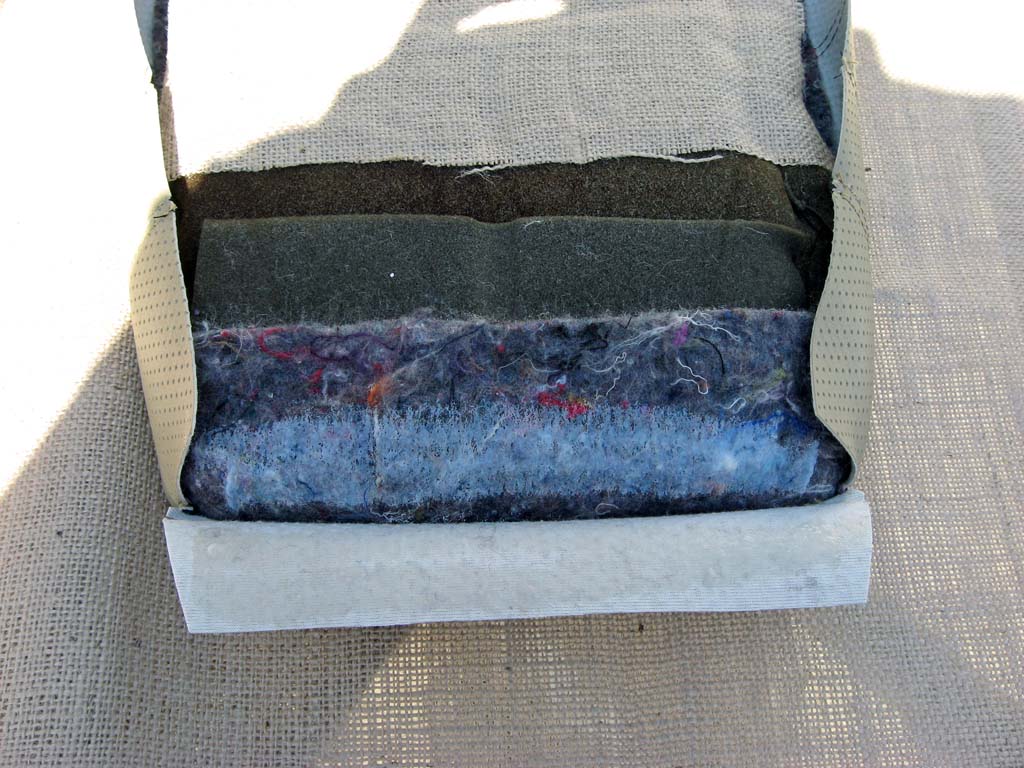
The batting along the top was then glued and trimmed onto the foam. Then the top edge vinyl was glued down. |
|
|
|
|
|
The sides were then wrapped around and glued onto the pad. |
|
|
|
The batting along the bottom edge was then glued and trimmed. |
|
|
|
Backrest center cushion ready for installation. |
|
|
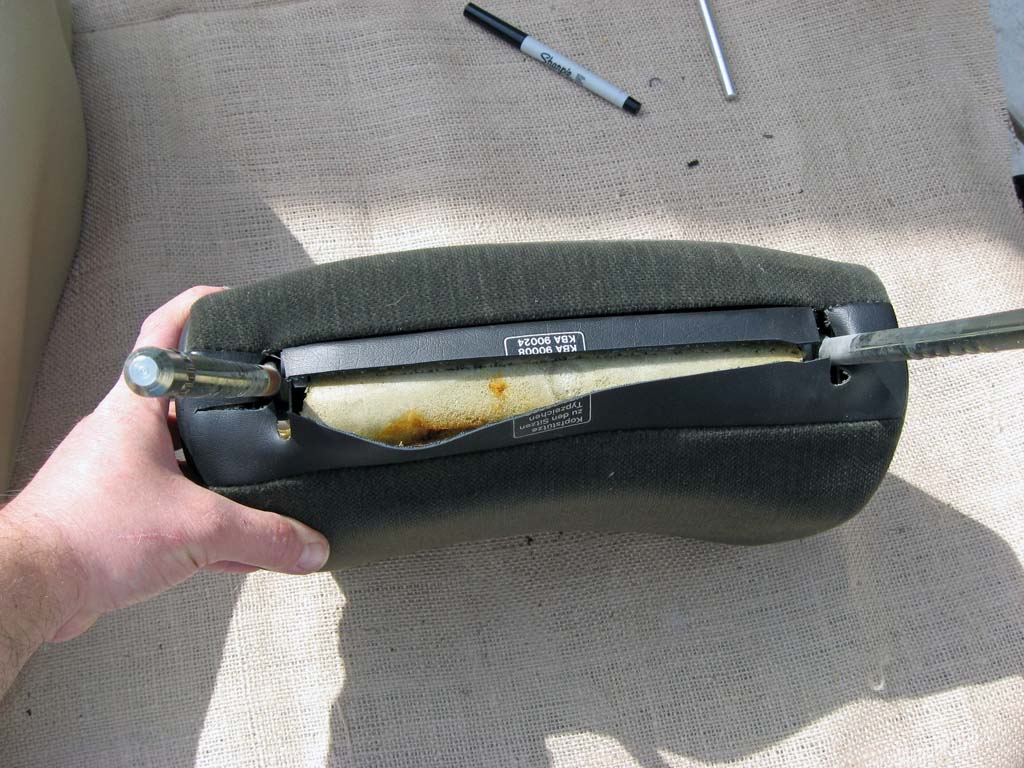
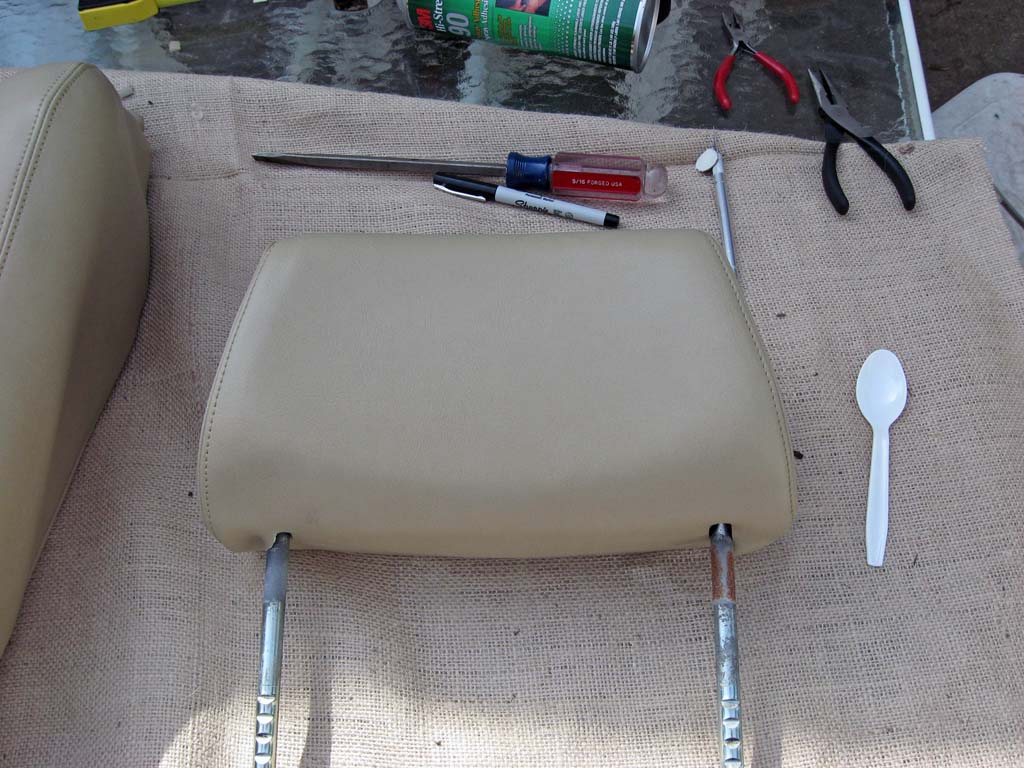
Headrest Recovering the headrest
is an interesting project. It takes some time and care to get the
new cover over the headrest foam and all the seams located correctly.
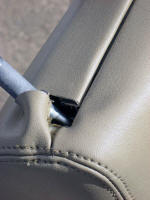
The cover is closed using a metal bracket that the edges of the cover
are folded and crimped into.
|
|
|
|
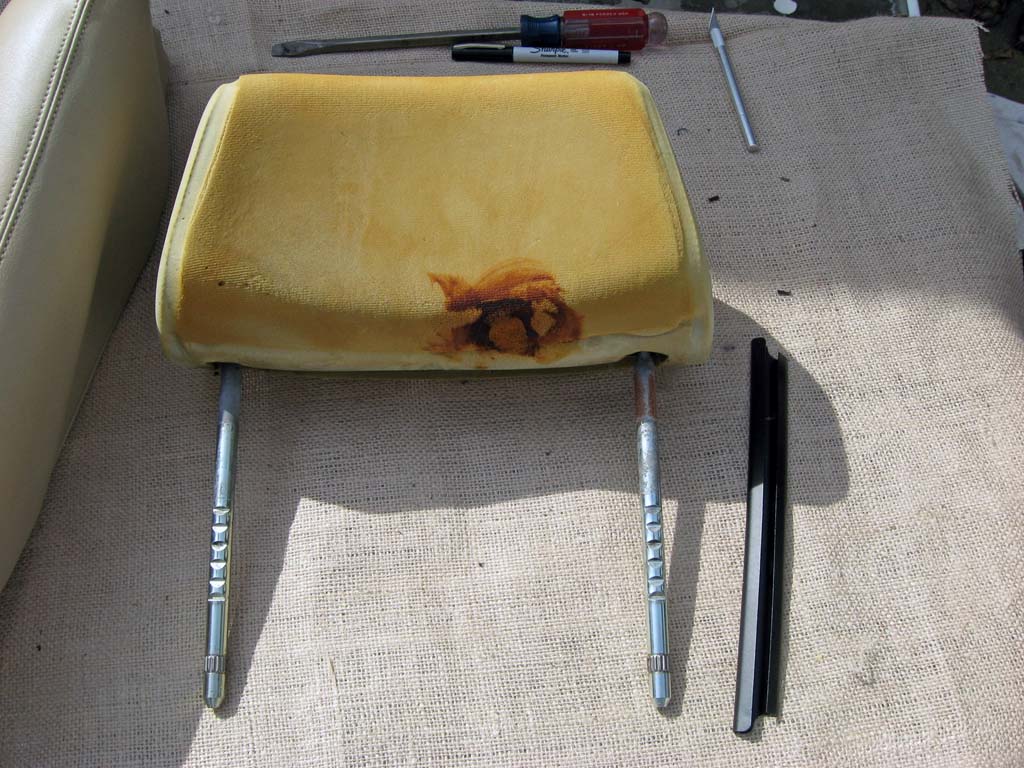
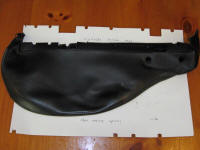
The easiest way to remove the old cover is to cut it off. |
|

|
|
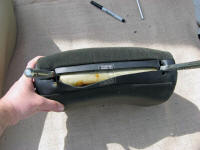
The headrest foam and the bracket used to close the cover. I don't want to know what that stain is on the foam. There was no sign of anything on the old cover. |
|

|
|
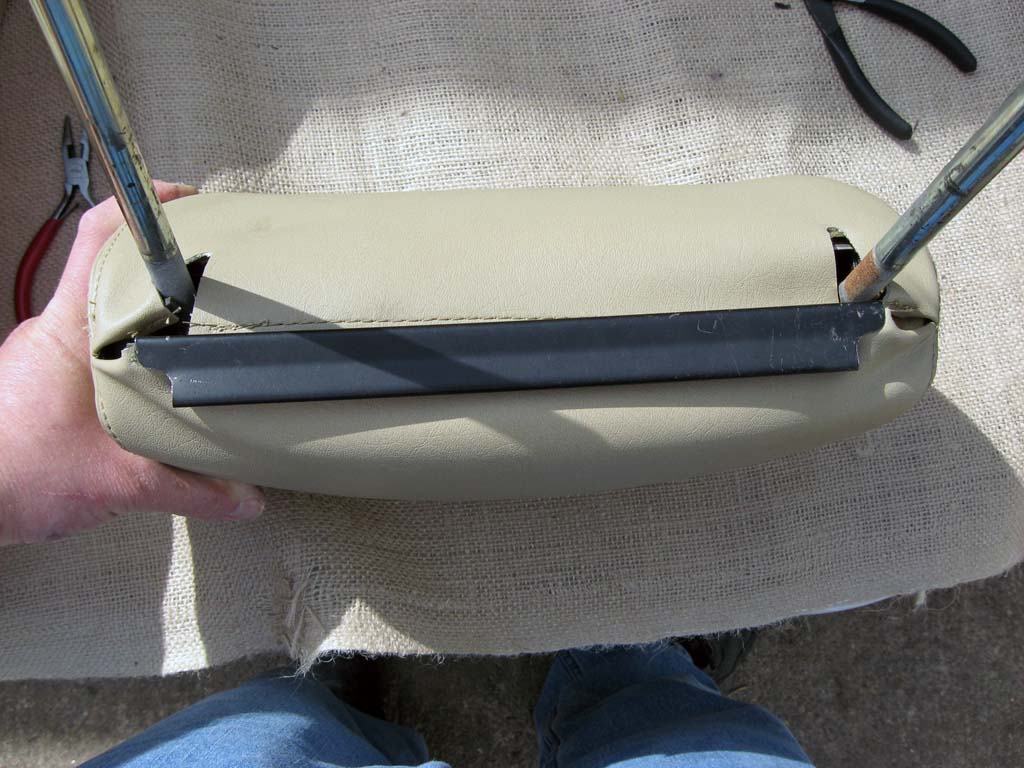
Carefully pull the new cover over the foam. Start by getting one end located and then work across the foam pulling the cover over. You need to be carefull to get the seams lined up and not rip the seams of the new cover. It is a tight fit. Next insert the longer edge of the cover into the bracket as shown. |
|

|
|
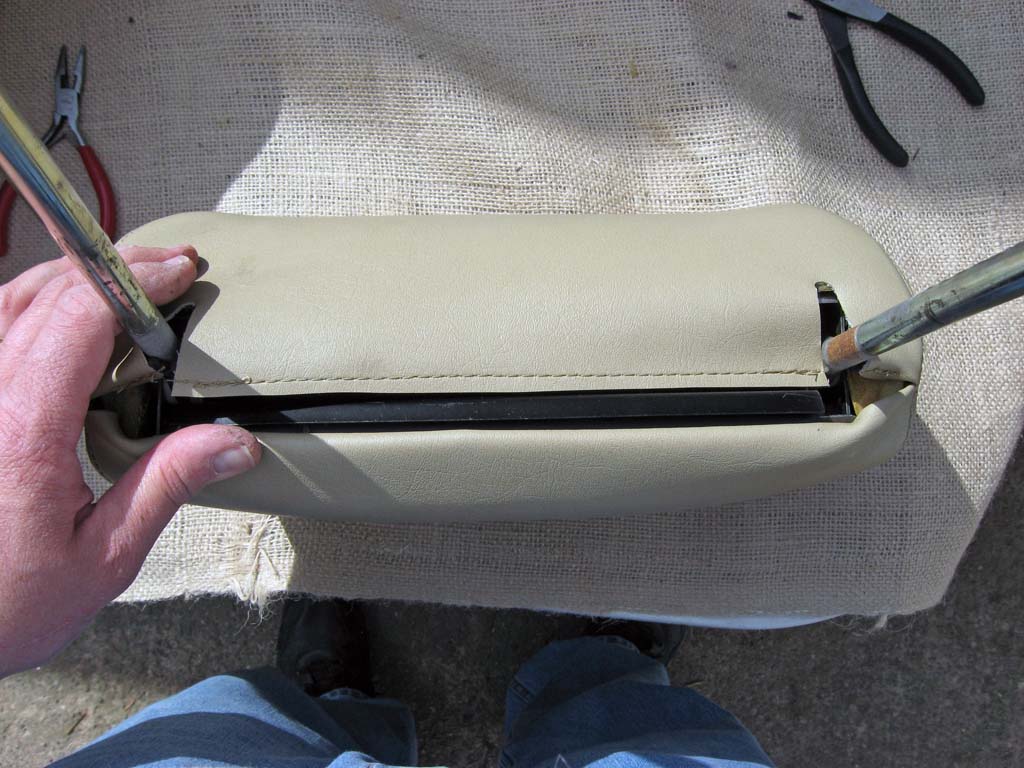
With the edge of the cover inserted into the bracket, crimp the ends of the bracket to secure the cover. |
|
|
|

|
|
Now flip the bracket over. This will put a fold in the crimped end of the cover locking it into place. |
|
|
|
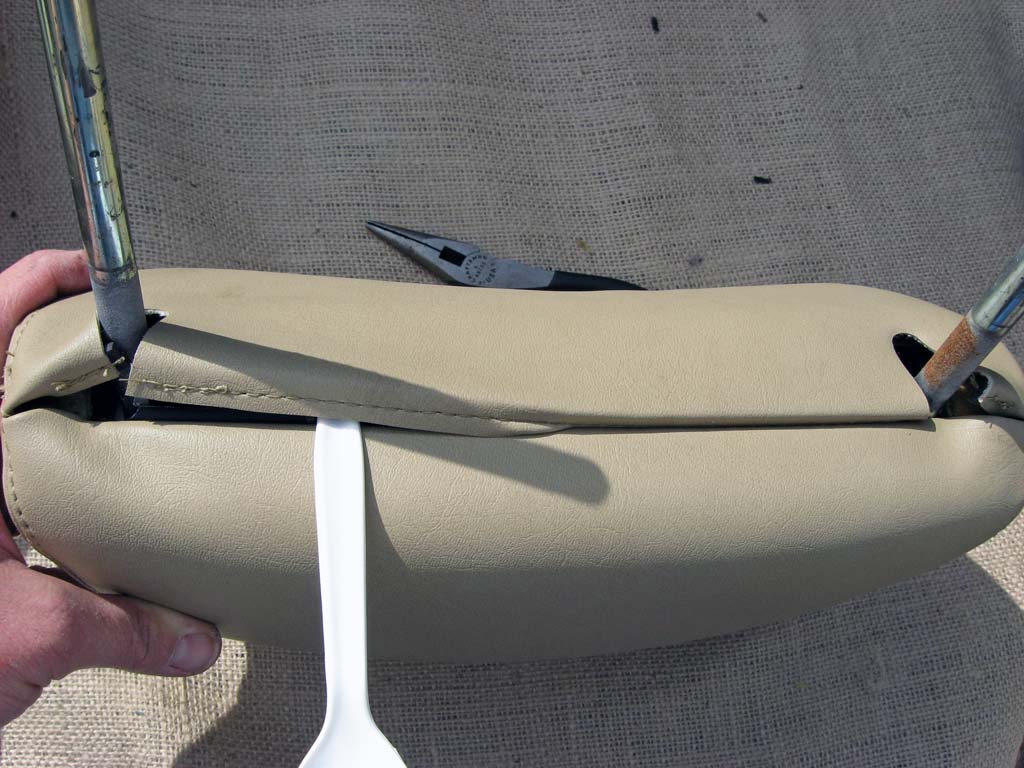
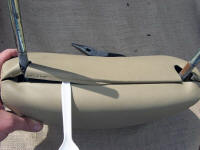
Now you need to fold the other edge of the cover and insert the folded edge into the other side of the bracket. Start at one end the work the edge into the bracket. I found the handle of a plastic spoon helped to push the cover without damaging it. |
|
|
|
Then you crimp the ends of the other side of the bracket locking the other edge. Now tuck in the remaining edges of the cover to finish. |
|
|
|
One recovered headrest. |
|
|
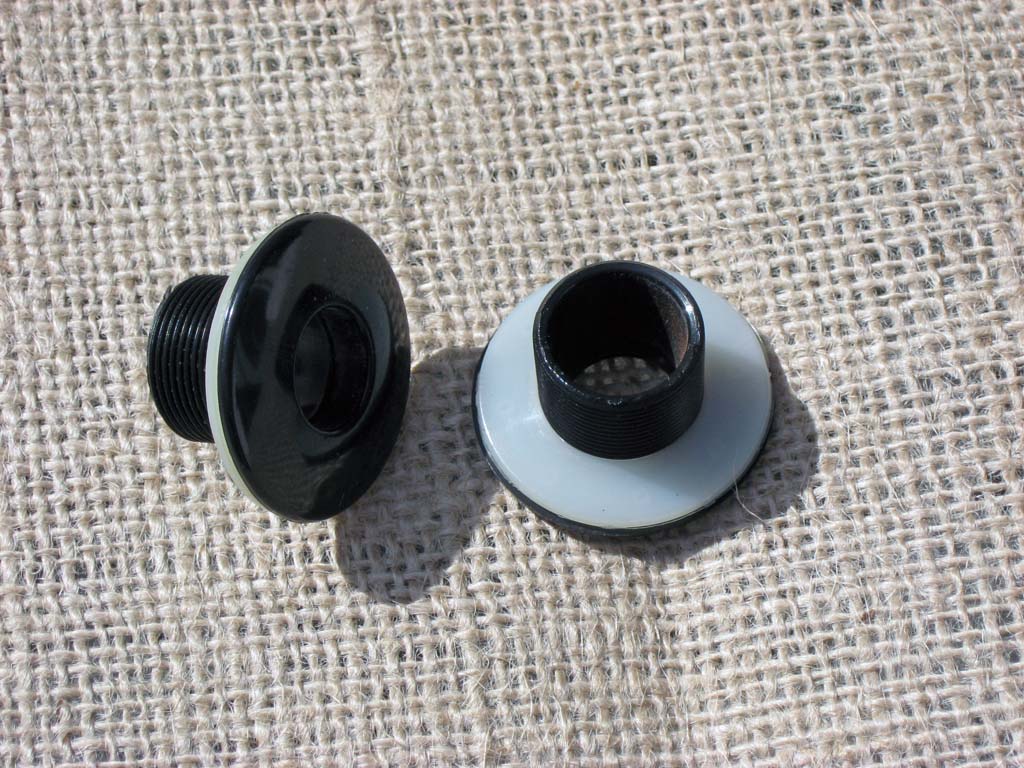
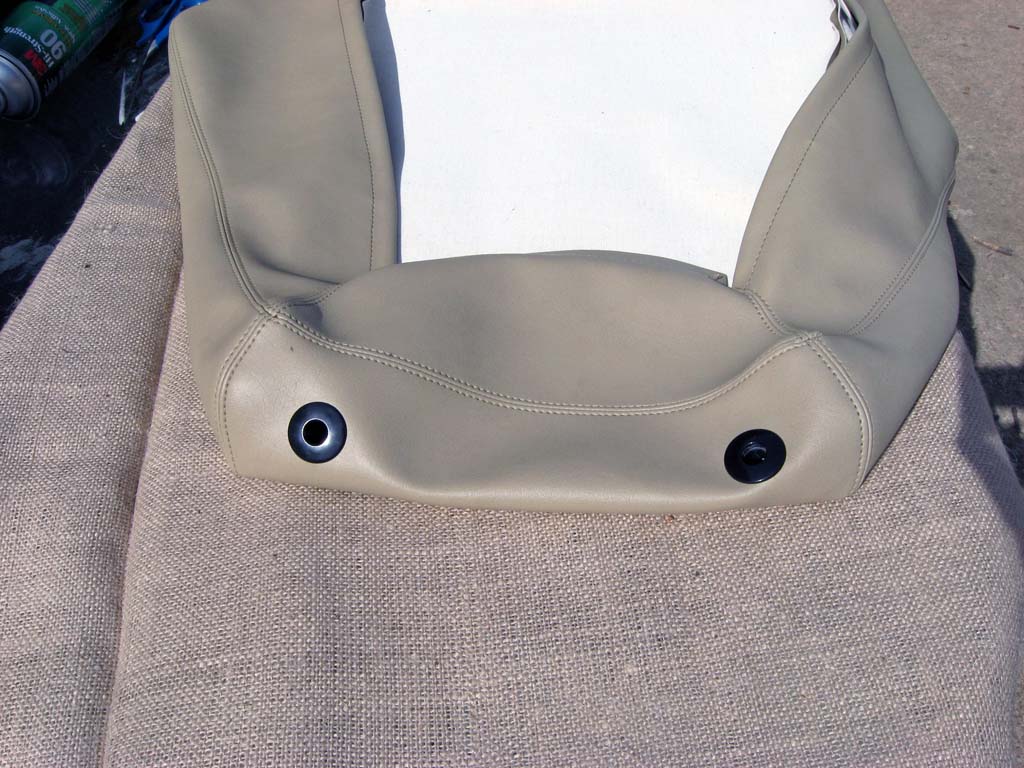
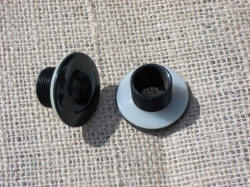
Back Cushion The first thing
you need to do with the seat back cover is install the grommets for the
headrest posts. Take you time locating the holes for the grommets
as this will determine the fit of the top of the back cover. I was
just a little off on the first seat I did (the driver's side) and as a
result I have some minor wrinkles in the top corners of the cover.
|
|
|
|
The headrest grommets pulled out of the original cover. |
|
|
|
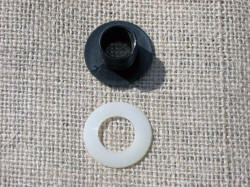
Carefully pry the white washers off of the grommet. Be careful! It is easy to pry too hard and break one of the washers. |
|
|
|
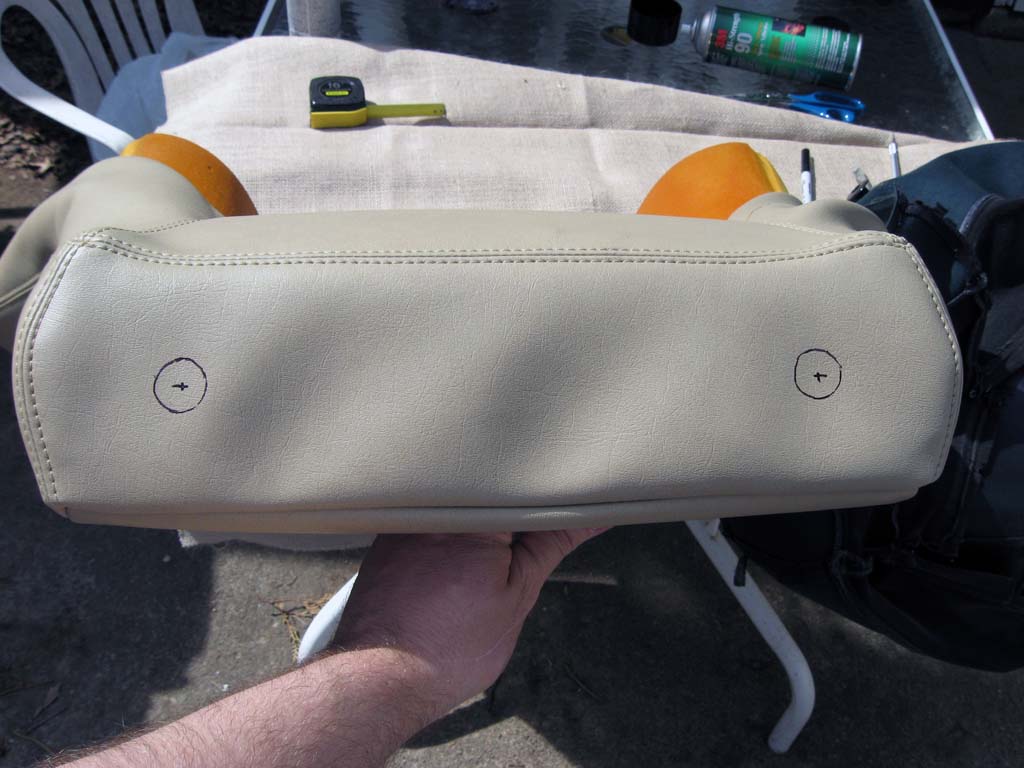
Place the cover over the seat back. Take your time to get the seams located correctly. Then transfer the location of the holes from the original cover using the seams as a reference. |
|
|
|
|
|
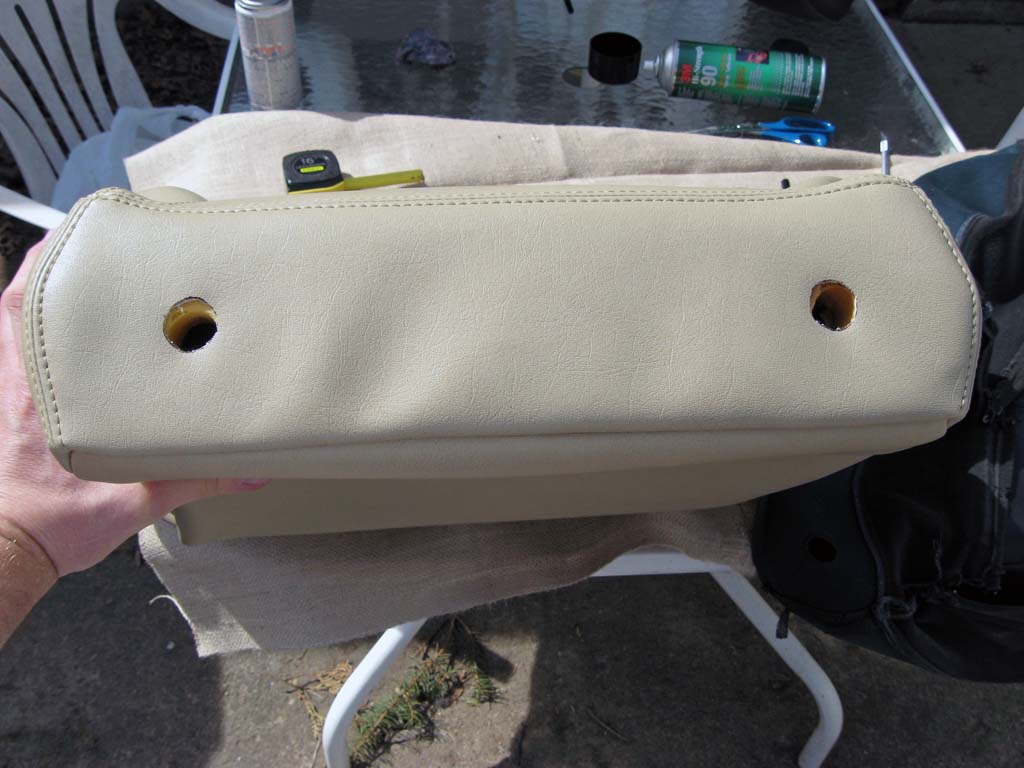
Cut out the holes. |
|
|
|
Install the grommets into the new cover. |
|
|
Once all the preparation work with the headrest and grommets are
complete, installing the seat back cover is not too difficult. The
tricky parts are getting the top corners correct and getting the bottom
flaps folded over correctly.
|
|
|
|
Mark and cut out the slots for the mounting wire and tabs on the two sides and the top. |
|
|
|
Next install the headrest and don't forget to install the retaining pins on each headrest post. You will not be able to get to these once the cover is fastened to the seat frame. |
|

|
|
With the headrest installed, take a minute to make sure the top corners of the cover are located correctly. |
|
|
|

|
|
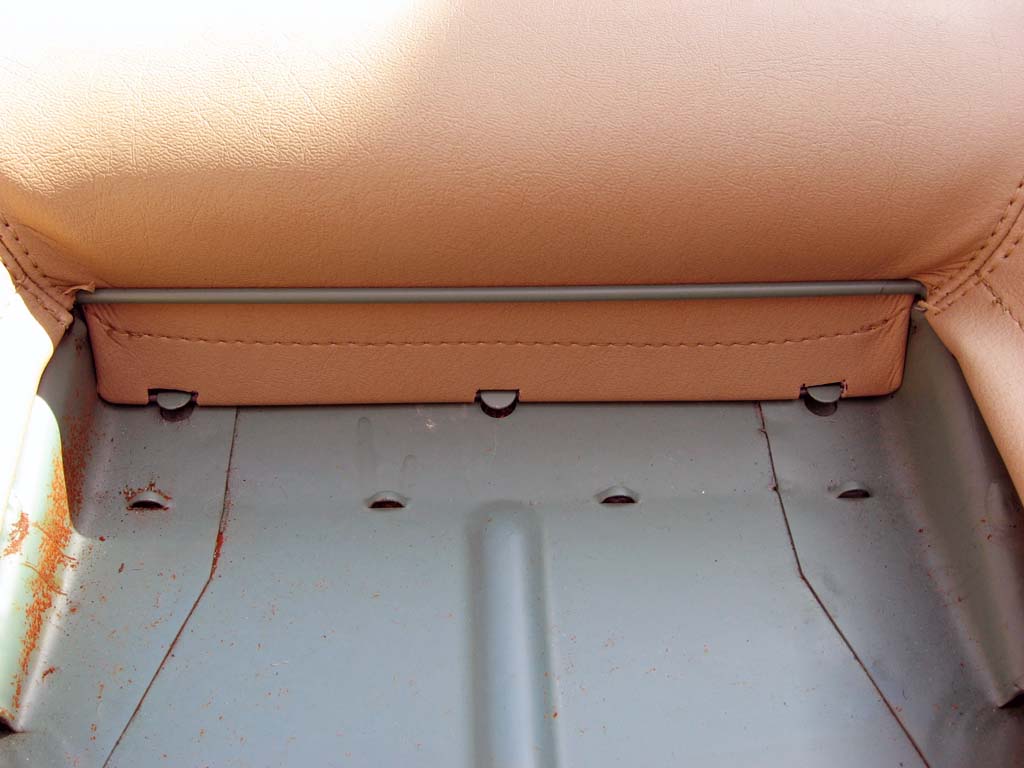
Tuck the top flap of the cover under the metal rod that runs across the top of the seat frame. Install the mounting wire under the three tabs. You will need to work the corners a little to get this flap into position. |
|

|
|
Next install the retaining wires in the sides under the tabs in the seat frame. |
|
|
|
You need to fold the material around the bottom corners and fold the end over the bar across the bottom and clip it into position. This operation requires either three hands or a lot of harsh language to complete. |
|
|
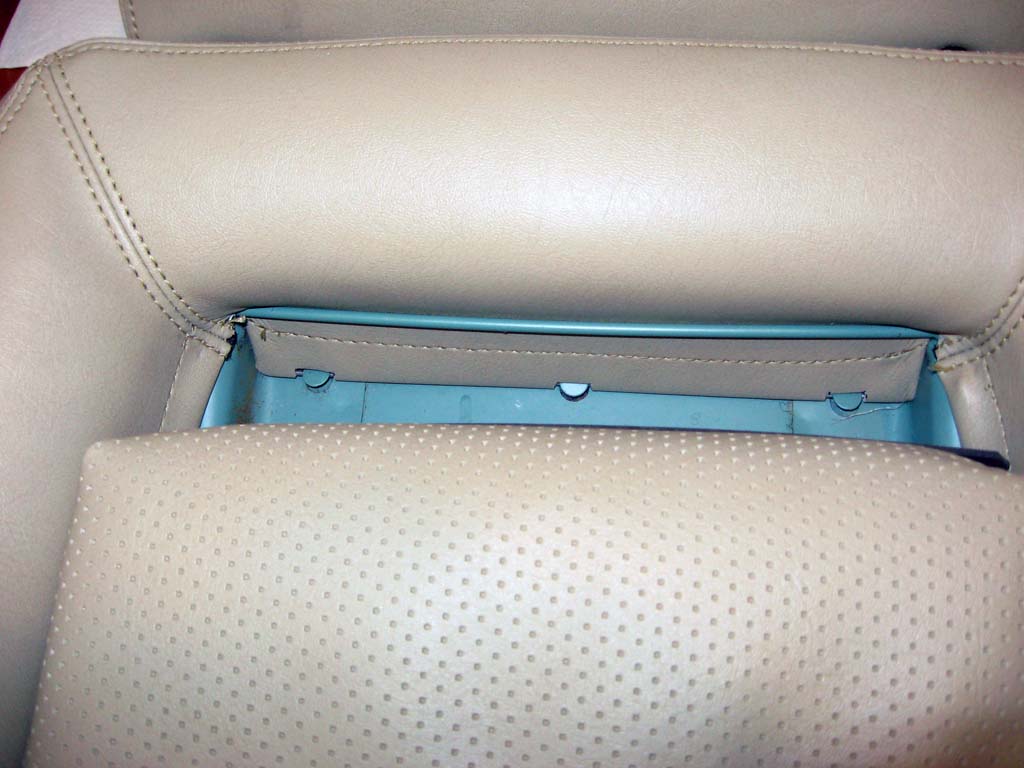
I found the installation of the center rear cushion about the most
difficult part of the project. It takes a lot of hand strength to
get the top of the cushion installed. The hog rings used about 1/3
of the way down the cushion are also difficult to install in tight
surroundings.
|
|
|
|
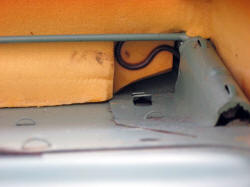
That stiff piece of cardboard that is sewn onto the top of the center cushion needs to be pushed under the steel rod that runs across the top of the frame. |
|
|
|
This is where that cardboard needs to be placed. You need to push it down in between the steel rod and the top part of the cover. |
|
|
|
Start at the center of the cushion and push the cardboard down below the rod working from the center out to each side. This takes strong hands/fingers. |
|
|
|
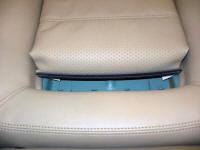
Now flip the seat back up and locate the positions of the hog rings. I only installed two rings, one on each side. |
|
|
|
|
|
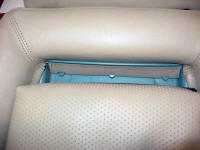
Hog rings pushed through the vinyl and the burlap. They are not pulling out any time soon. |
|
|
|
Now slide the rings through the tabs on the seat frame and crimp them closed. This takes a little practice. I found that needle nosed vice-grips worked well in the cramped location. Hog ring pliers had a hard time getting onto the rings. |
|

|
|
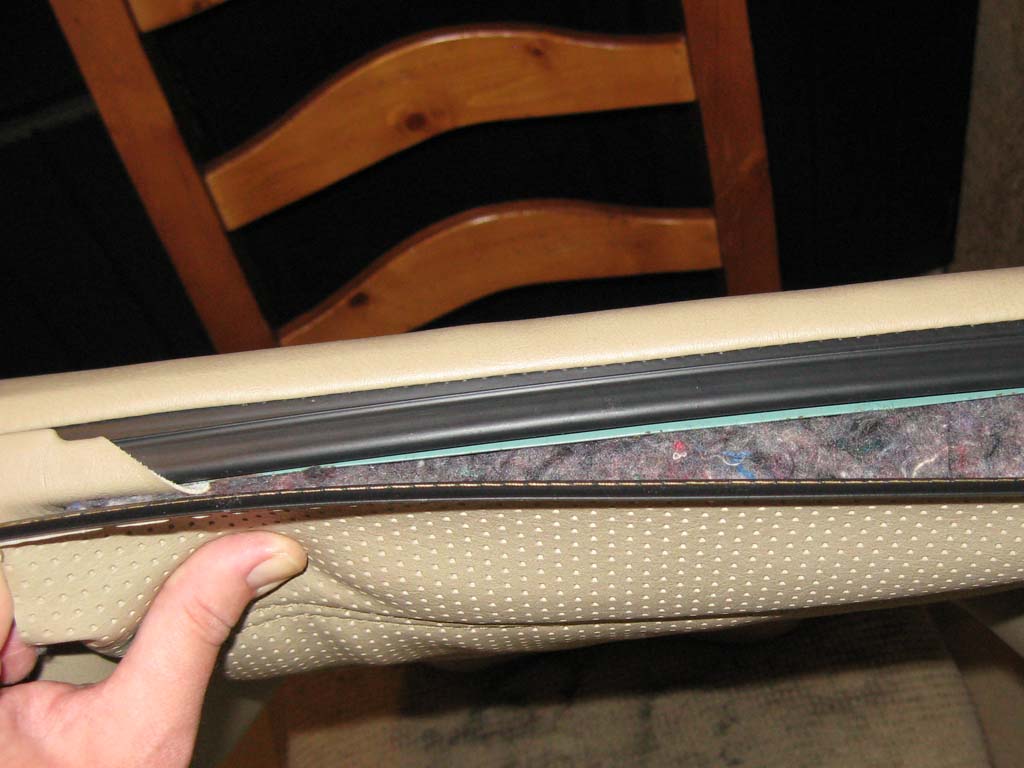
Now you need to fold that plastic stip running along the bottom of the center cushion over so that the strip clips into the channel on the bottom of the back cover. |
|
|
|
Bottom edge clipped into the channel. |
|
|
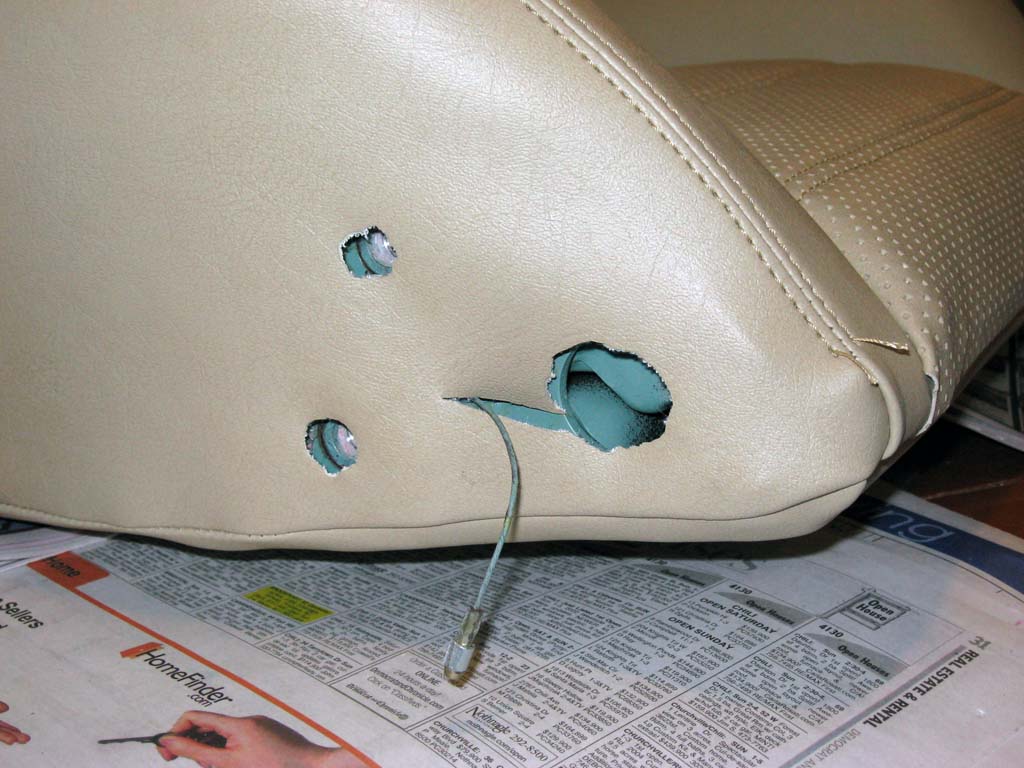
Final
Assembly Here are some pictures of a few of the steps in
the final assembly of the seat brackets and hardware. It is all
pretty straight forward so I did not take a picture of every step.
These pictures are representative of the work involved. Make sure
you use some loctite on the mounting screws during assembly.
|
|
|
|
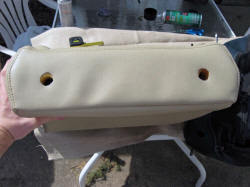
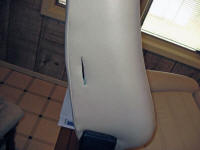
Locate the mounting holes for the brackets by feel and carefully cut the vinyl around them. |
|

|
|
Hog rings installed on the seat straps to keep them from sliding around. Mounting rails installed onto the seat frame. |
|

|
|
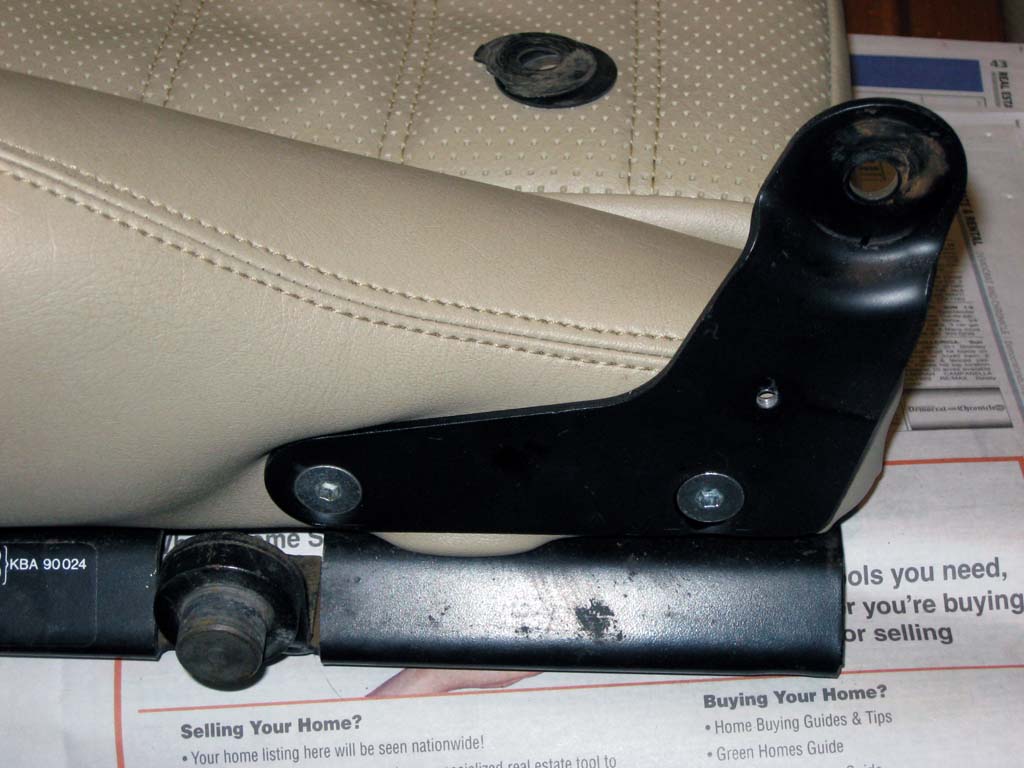
Cut-outs for the seat adjuster bracket. |
|

|
|
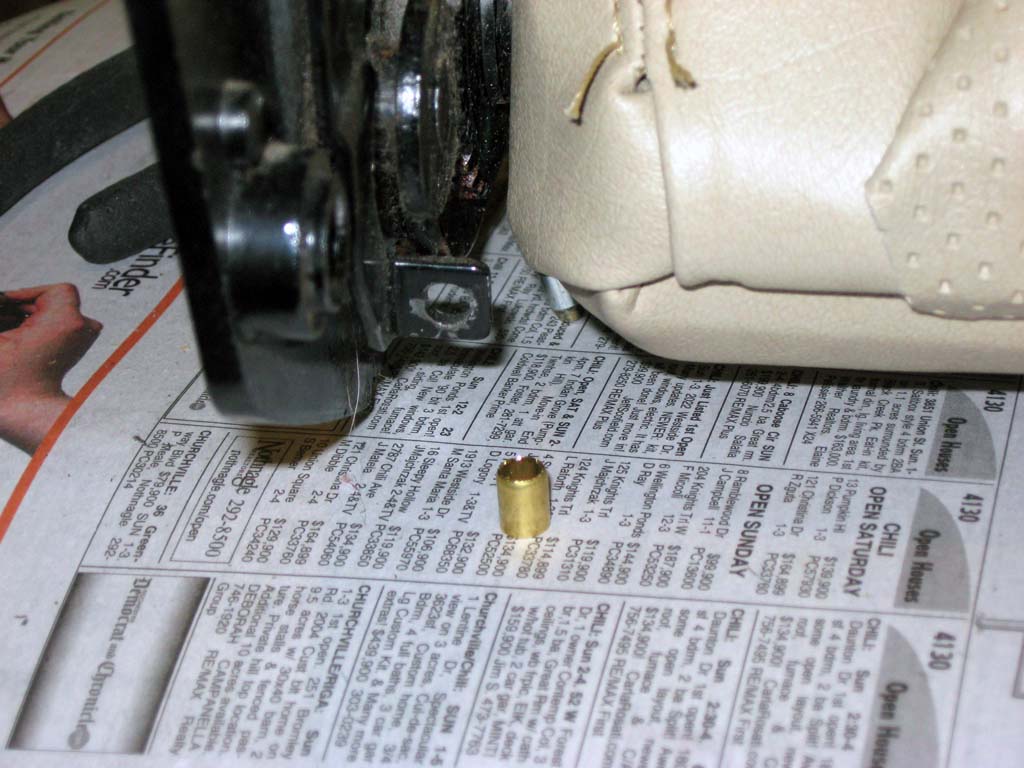
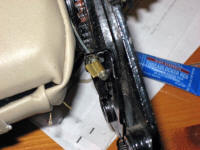
I found that a short (1/4 inch) length of scrap brass tubing worked well for replacing the crimped-on collar on the seat release cable. |
|
|
|
|
|
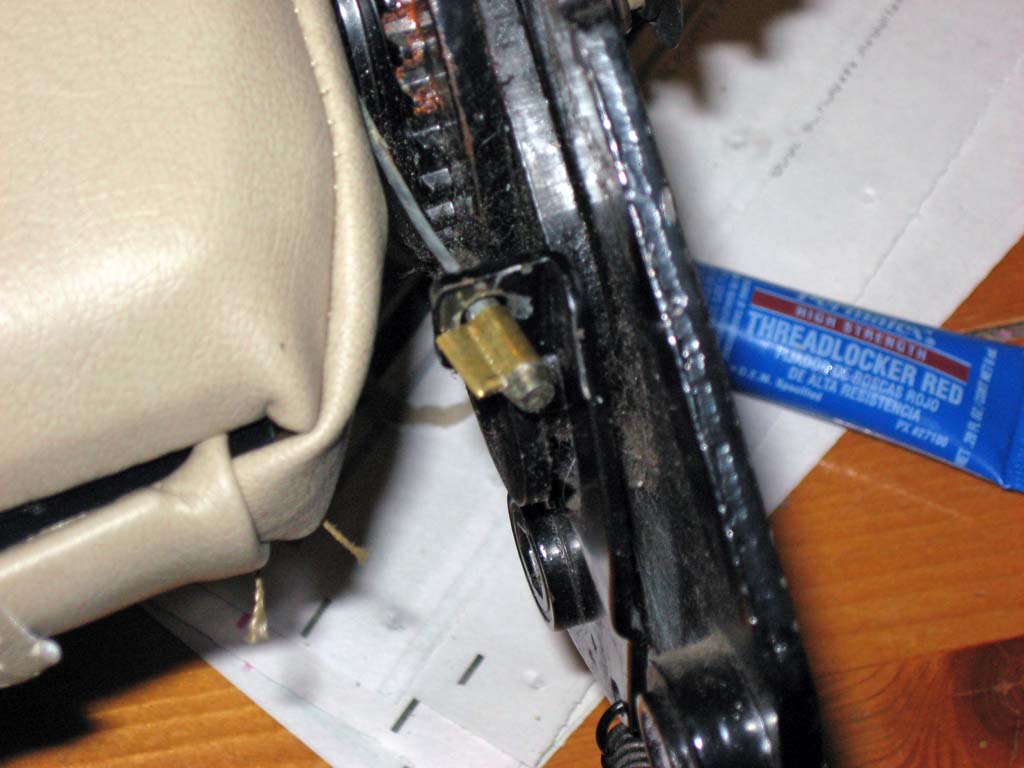
Tubing crimped in place on the release cable. |
|
|
|
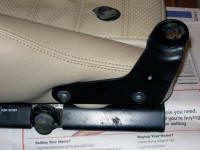
Install the pivot bracket on the bottom and the adjuster bracket on the back. |
|
|
|
Locate the slots for the release levers by feel and cut slots in the vinyl. Add small cross-cuts at the top and bottom. |
|
|
|